We have seen Keypad interfacing with 8051, in our previous tutorial. In this tutorial, we will interface Temperature Sensor (LM35) with 8051 using ADC0804. ADC0804 interfacing with 8051. ADC0804 is an 8-bit ADC.
Table of Contents
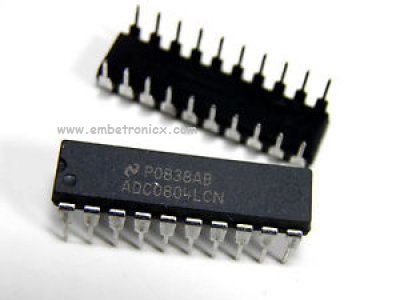
ADC0804 interfacing with 8051
Introduction
Analog to digital converters find huge applications as an intermediate device to convert the signals from analog to digital form. These digital signals are used for further processing by the digital processors. Various sensors like temperature, pressure, force, etc. convert the physical characteristics into electrical signals that are analog in nature.
Why we are using ADC for the 8051 Microcontroller?
Well. 8051 doesn’t have an inbuilt ADC. So we have to use an external ADC. There are many ADCs available.
- ADC 0804
- ADC 0808
In this post, we will see ADC 0804. In our next post, we will see ADC0808. Let’s Start.
ADC 0804
Features
- 0V to 5V analog input voltage range with single 5V supply
- Compatible with microcontrollers, access time is 135 ns
- Easy interface to all microprocessors
- Logic inputs and outputs meet both MOS and TTL voltage level specifications
- Works with 2.5V (LM336) voltage reference
- On-chip clock generator
- No zero adjust required
- 0.3[Prime] standard width 20-pin DIP package
- Operates ratio metrically or with 5 VDC, 2.5 VDC, or analog span adjusted voltage reference
- Differential analog voltage inputs
Pin Diagram

Pin Description

How to use the ADC0804?
- Make Cs(chip select) low(0) to activate the ic. Here we are directly connecting that CS into Ground instead of connecting into 8051.
- Make WR(write) pin low (0).
- Make RD(read) pin high (1).
- Make WR(write) pin high (1) after some delay small delay//This low to high impulse at WR pin starts your conversion.
- Now check the INTR(interrupt) pin if it is high(1) conversion is running if it is low(0) the conversion is over.
- Make RD=low(0) .
This will bring the converted value to the 8 data output pins of ADC 0804.
Temperature Sensor (LM35)
The LM35 series are precision integrated-circuit temperature sensors, whose output voltage is linearly proportional to the Celsius (Centigrade) temperature. The LM35 thus has an advantage over linear temperature sensors calibrated in ˚ Kelvin, as the user is not required to subtract a large constant voltage from its output to obtain convenient Centigrade scaling. The LM35 does not require any external calibration or trimming to provide typical accuracies of ±1 ⁄4˚C at room temperature and ±3 ⁄4˚C over a full −55 to +150˚C temperature range. Low cost is assured by trimming and calibration at the wafer level. The LM35’s low output impedance, a linear output, and precise inherent calibration make interfacing to readout or control circuitry especially easy. It can be used with single power supplies, or with plus and minus supplies. As it draws only 60 µA from its supply, it has very low self-heating, less than 0.1˚C in still air. The LM35 is rated to operate over a −55˚ to +150˚C temperature range, while the LM35C is rated for a −40˚ to +110˚C range (−10˚ with improved accuracy). The LM35 series is available packaged in hermetic TO-46 transistor packages, while the LM35C, LM35CA, and LM35D are also available in the plastic TO-92 transistor package. The LM35D is also available in an 8-lead surface to mount small outline package and a plastic TO-220 package.

Features
- Calibrated directly in ˚ Celsius (Centigrade)
- Linear + 10.0 mV/˚C scale factor
- 0.5˚C accuracy guarantee able (at +25˚C)
- Rated for full −55˚ to +150˚C range
- Suitable for remote applications
- Low cost due to wafer-level trimming
- Operates from 4 to 30 volts
- Less than 60 µA current drain
- Low self-heating, 0.08˚C in still air
- Nonlinearity only ±1 ⁄4˚C typical
- Low impedance output, 0.1 Ω for 1 mA load
ADC0804 interfacing with 8051
Now we will interface LM35 with MCS51 to monitor the Temperature on LCD display.
Connection Diagram
LCD:
- RS: P0.5
- RW: P0.6
- EN: P0.7
- Data Lines: P2
ADC:
- RD: P0.0
- WR: P0.1
- INTR: P0.2
- Output: P1
Temperature Sensor:
The output of Temp sensor – Vin+ (6)

Code
You can download this code on Github.
#include<reg51.h>

#define delay for(i=0;i<1000;i++);
#define lcd P2

sbit rd=P0^0;
sbit wr=P0^1;
sbit intr=P0^2;

sbit rs=P0^5;
sbit rw=P0^6;
sbit en=P0^7;

void lcd_int();
void cmd(unsigned int b);
void dat(unsigned int c);
void show(unsigned char *s);

unsigned char adc(),get_value, conv;
int i;

void main()
{
    lcd_int();
    show("Temp : ");
    while(1)
        {
        get_value = adc();
        cmd(0x87);
        dat((get_value/100)+48);
        dat(((get_value/10)%10)+48);
        dat((get_value%10)+48);
        dat(0x60);
        dat('C');
        }
}

void lcd_int()
{
    cmd(0x38);
    cmd(0x0e);
    cmd(0x06);
    cmd(0x01);
    cmd(0x80);
}

void cmd(unsigned int b)
{
    lcd=b;
    rs=0;
    rw=0;
    en=1;
    delay;
    en=0;
}

void dat(unsigned int c)
{
    lcd=c;
    rs=1;
    rw=0;
    en=1;
    delay;
    en=0;
}

void show(unsigned char *s)
{
    while(*s)
        dat(*s++);
}

unsigned char adc()
{
    wr=0;
    rd=1;
    wr=1;
    while(intr==1);
    rd=0;
    conv=P1;

    return conv;
}
Output

[ Please find the output image Here ]
In our tutorial, we are interfacing Temperature Sensor with 8051 by using ADC0804. Like this, you can interface with any analog sensor. In our next tutorial, we will see how to interface ADC0808 with 8051.
You can also read the below tutorials.
Embedded Software | Firmware | Linux Devic Deriver | RTOS
Hi, I am a tech blogger and an Embedded Engineer. I am always eager to learn and explore tech-related concepts. And also, I wanted to share my knowledge with everyone in a more straightforward way with easy practical examples. I strongly believe that learning by doing is more powerful than just learning by reading. I love to do experiments. If you want to help or support me on my journey, consider sharing my articles, or Buy me a Coffee! Thank you for reading my blog! Happy learning!
