We have started a new Tutorial Series for Raspberry PI Pico. The aim of this series is to provide easy and practical examples that anyone can understand. In this series, we will be giving examples in both C and MicroPython. This post is helping you to setup the windows machine for both C/C++ and MicroPython development (Raspberry PI Pico Setup) and write the Blinky program in both C and Micropython.
We have attached the video explanation also at the bottom of this post.
Table of Contents
Hardware Required
- Raspberry PI Pico PCB Circuit board
- LED with Resistor
- Button for the Reset circuit
- Windows machine
Introduction
Raspberry PI is used to develop the boards like mini-computer which runs Linux, Rasbian OS, etc. But the very first time, they have developed a microcontroller board like ESP32. Raspberry Pi Pico is a $4, tiny, fast, and versatile board built using RP2040, a brand new microcontroller chip designed by Raspberry Pi in the UK.
Raspberry PI Pico has the below specifications.
- Raspberry Pi designed RP2040 chipset
- Dual-core ARM Cortex M0+ processor at up to 133MHz with variable core frequency
- 264kB SRAM & 2MB onboard flash memory
- 26 Multifunction GPIO pins (23x digital-only, 3x ADC capable)
- 2x SPI, 2x I2C, 2x UART, 3x 12-bit ADC and 16x controllable PWM channels
- The Pico can be surface mounted as a module
- Accurate clock and timer on chip
- Temperature sensor
- Accelerated floating-point libraries
- Micro USB port for power & data
Let’s not waste the time. Directly we will jump to the setup process.
|
|
|
Connection Diagram
The connection diagram is given below.
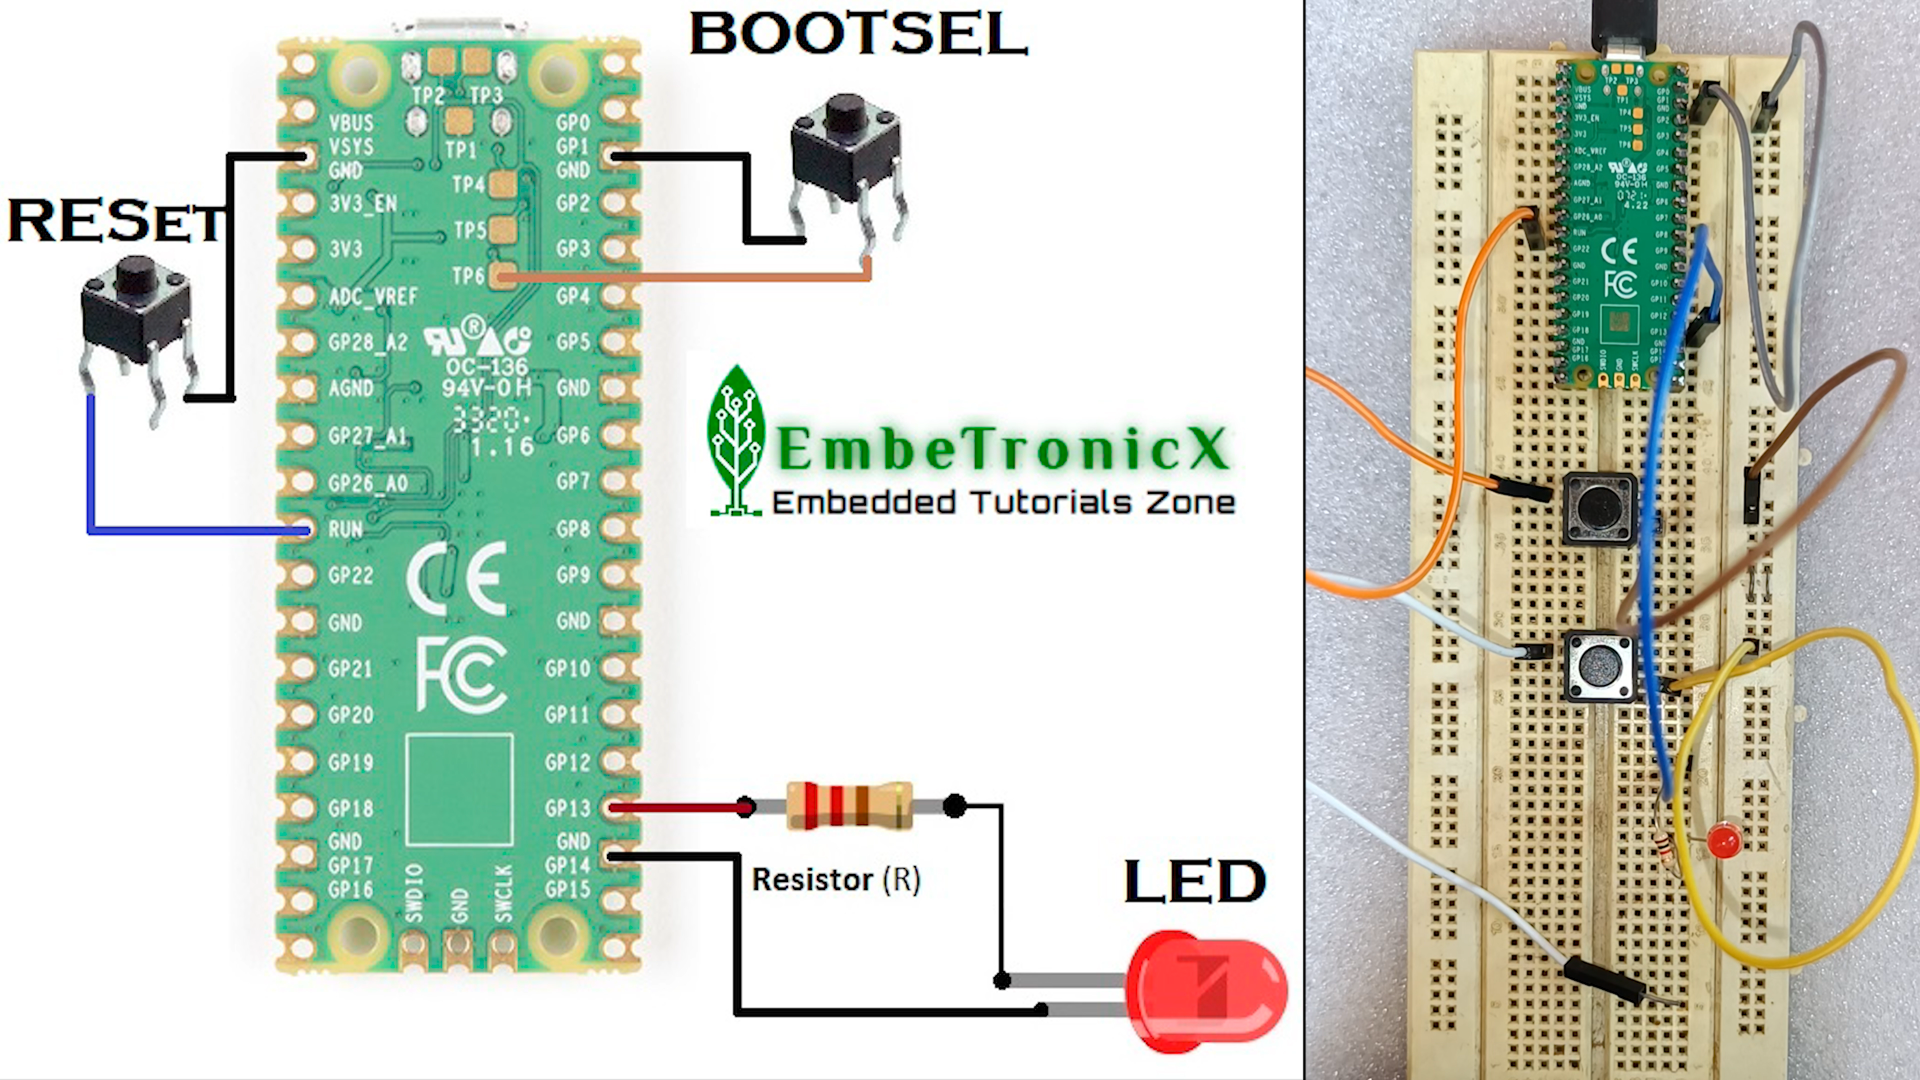
If you see the connection diagram, there I have connected two buttons. One will act as a reset button and another button will act as a BOOTSEL button. The reset button is connected with the Run pin and ground. So, when you press that reset button, it will reset the Pico. I don’t want to unplug and plug the USB from the board. That’s why I have added this reset button.
And the soft BOOTSEL button was broken off by my hard hand. That’s why I have added another button. One end of the button will connect to TP6 and another end will be connected to the ground.
The LED is connected to the GP13 via a resistor. You can also use the onboard LED that is connected to the GP25.
|
|
|
Raspberry PI Pico Setup C/C++ Development
I like ESP32 and Raspberry PI. Because they will be having the proper documentation for everything. They have Getting started with Raspberry PI PICO document for the C and C++ development and it has almost all topics.
We have to install a few software like CMake, Toolchain, Python, etc. That will be like a hectic process. But I will be following the method which has been given in this repo. This will take care of everything for the C and C++ development.
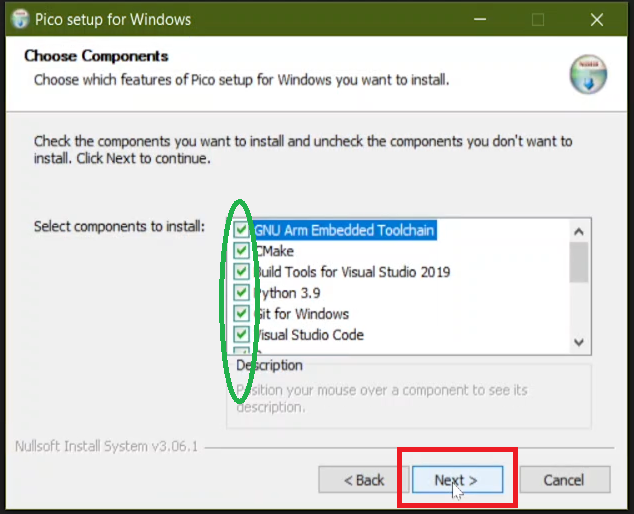
Go to the latest release of that repo, and download the pico-setup-windows.exe.
- Open that software.
- Click Next

- Then it will install the selected applications. Press Next.
|
|
|
- Then select the destination folder where you want to download the SDK and examples.
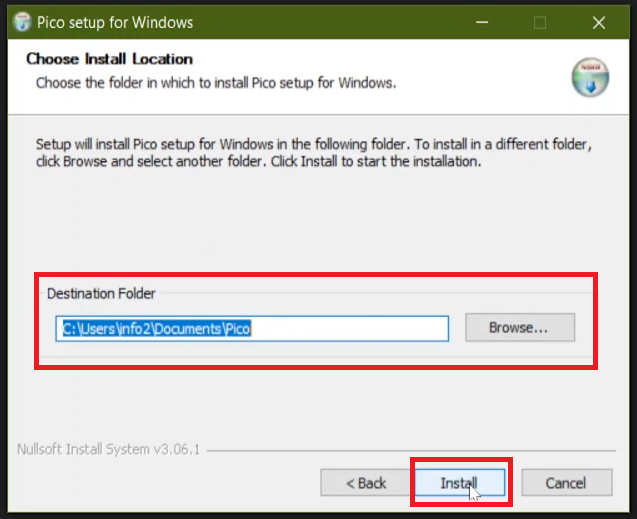
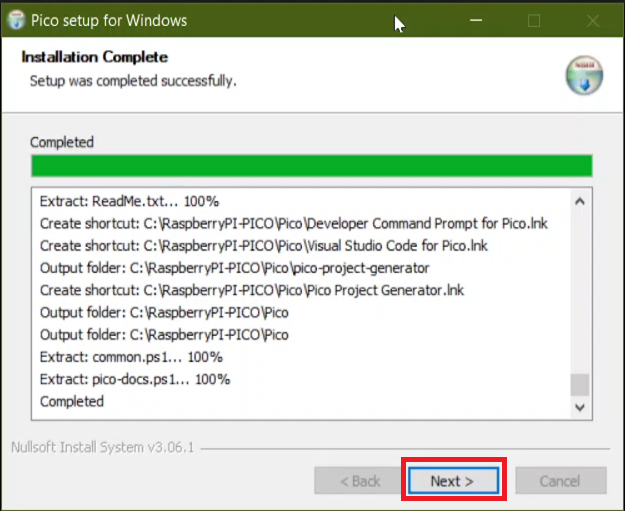
- Wait until it completes. You will get the screen like below. Click Next.
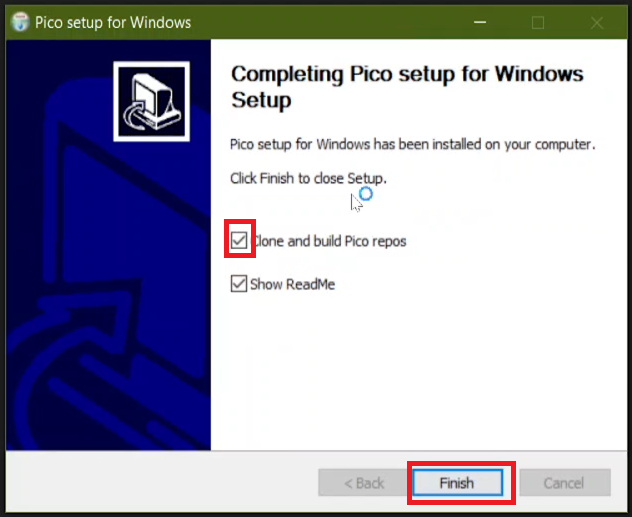
- Then check the “Clone and Build Pico repos” and click Finish.
- Wait till it clones. Then you will see the files like the below image.
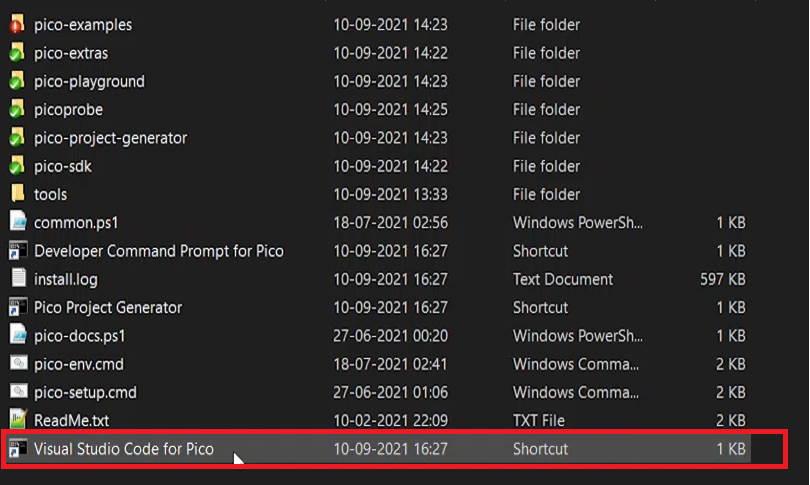
- In this series, I am not going to use the command line to build the code. Instead, I will be using Visual Studio Code software for our development. So, whenever you want to open the Visual Studio Code for PICO development, please open it by opening the Visual Studio Code for Pico shortcut. Because it will add the necessary PATH to the environment variables. Open the Visual studio code by clicking the “Visual Studio Code for PICO“.
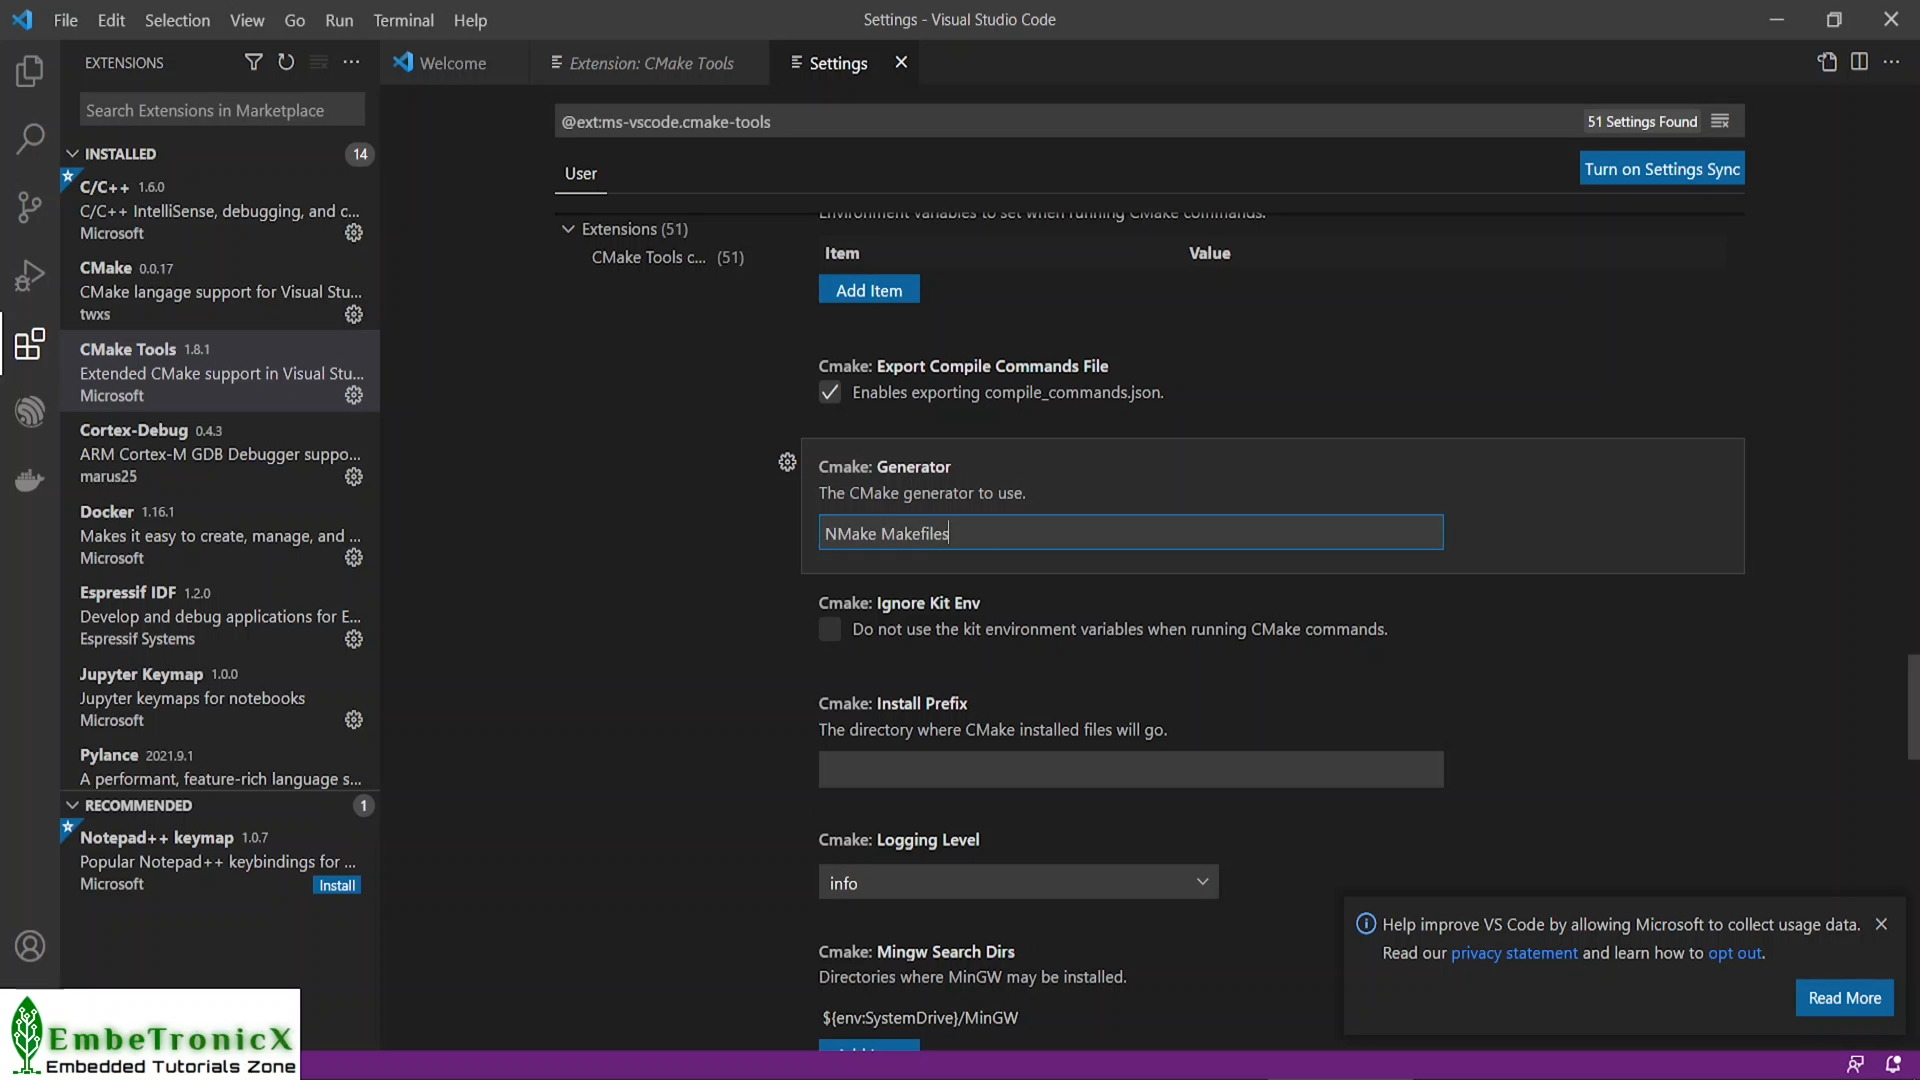
- Then go to the CMake Tools Extension setting, and add “NMake Makefiles” to the CMake: Generator like below.
|
|
|
- That’s all. We are done with the setup.
Blinky program in C
Let’s create two files called blinky.c and CMakeLists.txt. You can also download the source code from GitHub.
blinky.c
#include "pico/stdlib.h"

int main()
{
  uint led_pin = 13;

  //Init the GPIO
  gpio_init(led_pin);
  gpio_set_dir(led_pin, GPIO_OUT);

  while(1)
  {
    //Turn ON the LED
    gpio_put(led_pin, true);
    sleep_ms(1000);

    //Turn OFF the LED
    gpio_put(led_pin, false);
    sleep_ms(1000);
  }

}
CMakeLists.txt
# Set minimum required version of CMake
cmake_minimum_required(VERSION 3.13)

# Include build functions from Pico SDK
include($ENV{PICO_SDK_PATH}/external/pico_sdk_import.cmake)

# Set name of project (as PROJECT_NAME) and C/C   standards
project(blink C CXX ASM)
set(CMAKE_C_STANDARD 11)
set(CMAKE_CXX_STANDARD 17)

# Creates a pico-sdk subdirectory in our project for the libraries
pico_sdk_init()

# Tell CMake where to find the executable source file
add_executable(${PROJECT_NAME}
    blinky.c
)

# Create map/bin/hex/uf2 files
pico_add_extra_outputs(${PROJECT_NAME})

# Link to pico_stdlib (gpio, time, etc. functions)
target_link_libraries(${PROJECT_NAME}
    pico_stdlib
)

# Enable usb output, disable uart output
pico_enable_stdio_usb(${PROJECT_NAME} 1)
pico_enable_stdio_uart(${PROJECT_NAME} 0)
Demo
Let’s build the program. Click the “No Kit selected” and select the GCC arm toolchain. If you can’t able to see the No Kit selected, please close the Visual Studio Code and reopen with that shortcut. Now click the Build. Refer to the below video if you have any doubt. This has the demo as well.
Raspberry PI Pico Setup MicroPython Development
If you want to set up the MicroPython, then go to thonny.org and download the Python IDE. Then Install it. After that, open the Thonny software that we have installed now.
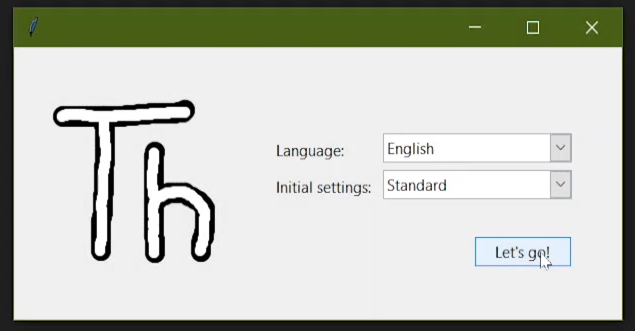
- Let the default setting be there, and click Let’s go!.
|
|
|
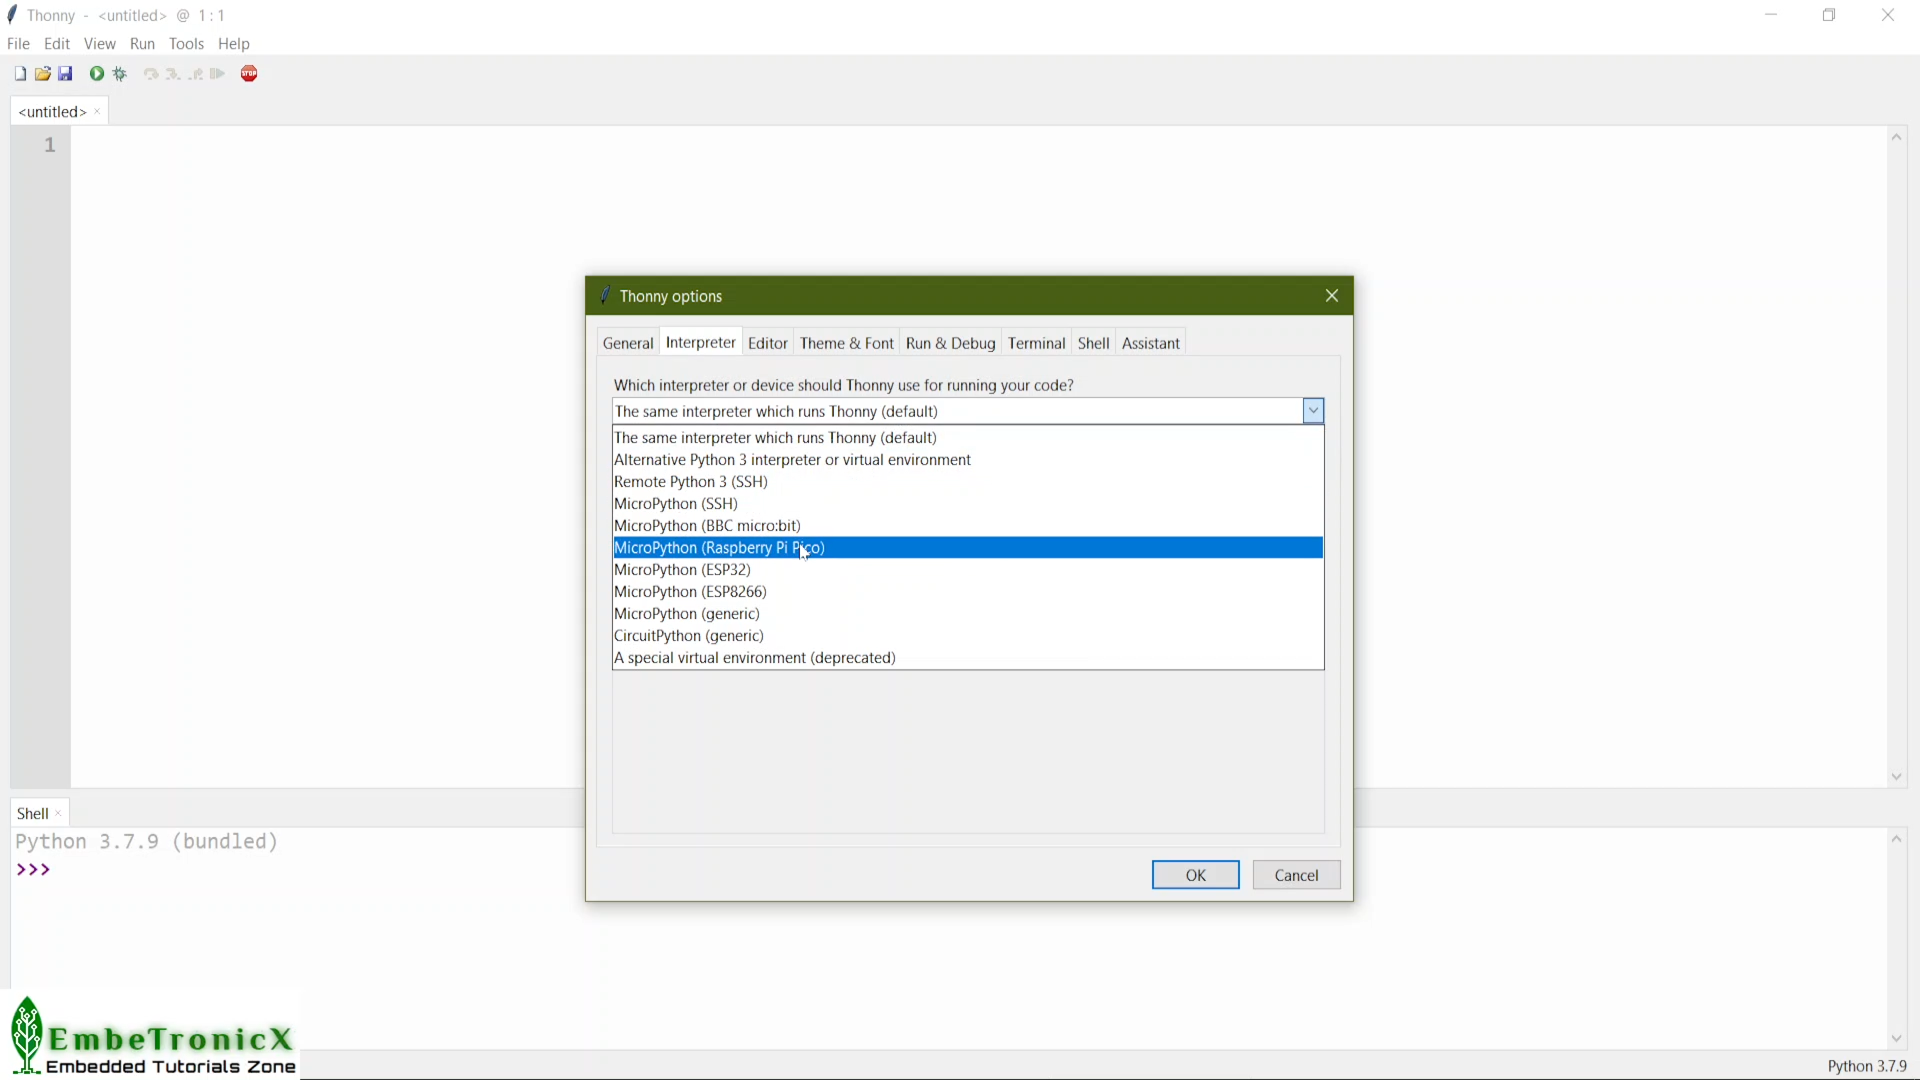
- Then Click Tools –> Options –> Interpreter tab. And select the MicroPython (Raspberry PI) and click Ok.
That’s all, we are done with the setup. Let’s write the code.
Blinky program in MicroPython
blinky.py
from machine import Pin
import utime

led = Pin(13, Pin.OUT)

while True:
    led.toggle()
    utime.sleep(1)
Demo
Press the BOOTSEL button and reset button to go to boot mode. Then Press the Run icon in the thonny software. It will ask to install the MicroPython firmware to the Pico. Please install it.
Then restart the board by Stop/Restart backend in the thonny app or press Ctrl+F2. After that, click the run icon. Now our code should run.
Please check the demo below.
|
|
|
That’s all. If you want to check the video explanation, then please check our below video.
Video Explanation
You can also read the below tutorials.
|
|
|
Embedded Software | Firmware | Linux Devic Deriver | RTOS
Hi, I am a tech blogger and an Embedded Engineer. I am always eager to learn and explore tech-related concepts. And also, I wanted to share my knowledge with everyone in a more straightforward way with easy practical examples. I strongly believe that learning by doing is more powerful than just learning by reading. I love to do experiments. If you want to help or support me on my journey, consider sharing my articles, or Buy me a Coffee! Thank you for reading my blog! Happy learning!
