Table of Contents
Description
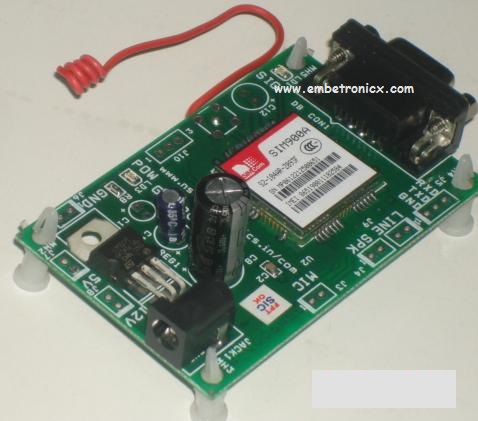
GSM/GPRS Modem-RS232 is built with Dual Band GSM/GPRS engine- SIM900A which works on frequencies 900/ 1800 MHz. The Modem is coming with an RS232 interface, which allows you to connect the PC as well as the microcontroller with RS232 Chip(MAX232). The baud rate is configurable from 9600-115200 through AT command. The GSM/GPRS Modem is having internal TCP/IP stack to enable you to connect with the internet via GPRS. It is suitable for SMS, Voice as well as DATA transfer applications in the M2M interface.
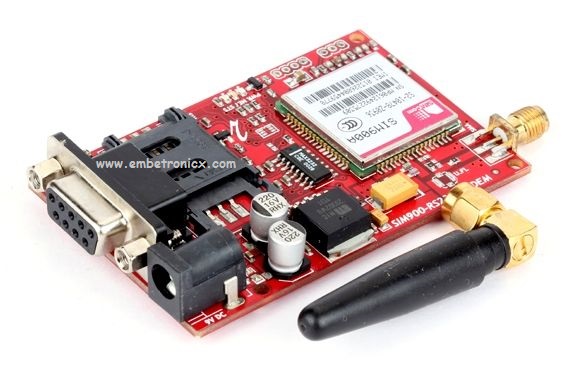
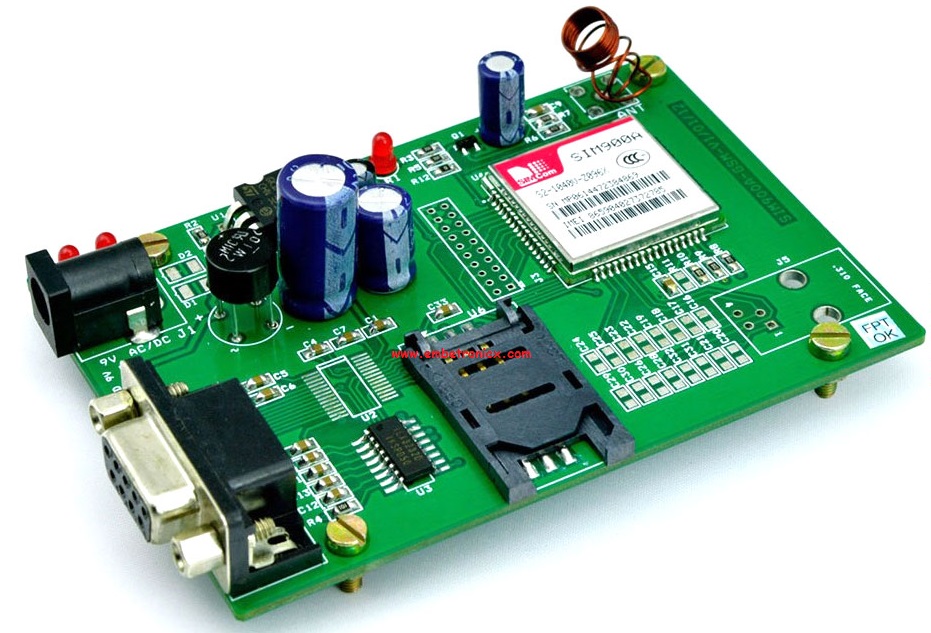
The onboard Regulated Power supply allows you to connect a wide range of unregulated power supplies. Using this modem, you can make audio calls, SMS, Read SMS, attend the incoming calls and internet etc through simple AT commands
GSM/GPRS Modem Fetures
- High Quality Product (Not hobby grade)
- Dual-Band GSM/GPRS 900/ 1800 MHz
- RS232 interface for direct communication with computer or MCU kit
- Configurable baud rate
- Wire Antenna ( SMA connector with GSM Antenna Optional )
- SIM Card holder.
- Built-in Network Status LED
- Inbuilt a Powerful TCP/IP protocol stack for internet data transfer over GPRS.
- Normal operation temperature: -20 °C to +55 °C
- Input Voltage: 12V DC
Important Notes
1. We use SIM900 GSM Module – This means the module supports communication in the 900MHz band. We are from India and most of the mobile network providers in this country operate in the 900Mhz band. If you are from another country, you have to check the mobile network band in your area. A majority of United States mobile networks operate in the 850Mhz band (the band is either 850Mhz or 1900Mhz). Canada operates primarily on the 1900 Mhz band.
|
|
|
2. Check the power requirements of the GSM module – GSM modules are manufactured by different companies. They all have different input power supply specs. You need to double-check your GSM module’s power requirements. In this tutorial, our gsm module requires a 12 volts input. So we feed it using a 12V,1A DC power supply. I have seen gsm modules that require 15 volts and some other which needs only 5 volts. They differ from manufacturers. If you are having a 5V module, you can power it directly from Arduino’s 5V out.
BOOTING UP THE GSM
1. Insert the SIM card to module and lock it.
2. Connect the adapter to module and turn it ON!
3. Now wait for some time (say 1 minute) and see the blinking rate of ‘status LED’ (GSM module will take some time to establish connection with mobile network)
4. Once the connection is established successfully, the status LED will blink continuously every 3 seconds.
|
|
|
Connections
In this picture I have mentioned how to connect the GSM with any microcontrollers.
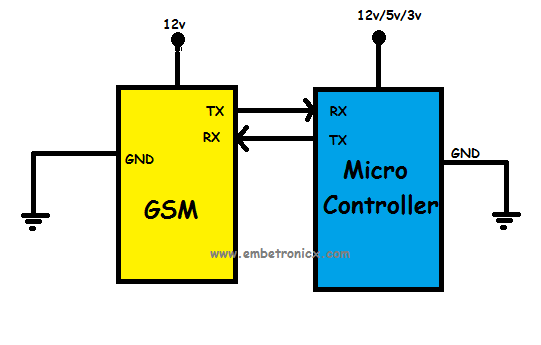
If you are giving a different power supply from a different source (socket or adapter) like above you should connect the common ground. Otherwise no need to give common ground.
Basic Commands
There are lots of commands used for GSM. Here we are going to use a few commands.
TO CHECK THE MODEM:
|
|
|
Send – AT
Receive – OK
TO CHANGE SMS SENDING MODE:
Send – AT+CMGF=1
Receive – OK
|
|
|
TO SEND NEW SMS:
Send – AT+CMGS=”MOBILE NO”
Send – <MESSAGE> “Your message”
Send – {CTRL+Z} (0x1A)
TO MAKE A VOICE CALL:
|
|
|
Send – ATD0123456789 (0123456789 – Dial number)
TO REDIAL LAST NO:
Send – ATDL
TO RECEIVE INCOMING CALL:
Send – ATA
|
|
|
TO HANG UP OR DISCONNECT A CALL:
Send – ATH
TO SET A PARTICULAR BAUD RATE:
Send – AT+IPR=? {To view the baud rate values}
Send – AT+IPR=0 {To set the modem to autobaud mode}
|
|
|
If you want all commands please download the Commands here. Thank you.
You can also read the below tutorials.
Embedded Software | Firmware | Linux Devic Deriver | RTOS
Hi, I am a tech blogger and an Embedded Engineer. I am always eager to learn and explore tech-related concepts. And also, I wanted to share my knowledge with everyone in a more straightforward way with easy practical examples. I strongly believe that learning by doing is more powerful than just learning by reading. I love to do experiments. If you want to help or support me on my journey, consider sharing my articles, or Buy me a Coffee! Thank you for reading my blog! Happy learning!
