This is the Series of tutorials on the STM32 Microcontroller. The aim of this series is to provide easy and practical examples that anyone can understand. This is the STM32 Ethernet Tutorial using CGI – HTTP Server Part 2 and in this tutorial, we are going to control the LEDs using the CGI.
Table of Contents
Hardware Required
We have our own EmbeTronicX Store called ChipTronicX. You can purchase the hardware from ChipTronicX.
- STM32F767Zi Nucleo Board
- Ethernet Cable
- Router
Prerequisites
STM32 Ethernet Tutorial using CGI
In this tutorial, we are going to make the changes on top of the previous tutorial’s source code. So, please go through that tutorial.
What is CGI?
CGI is the mechanism that is part of the Hypertext Transport Protocol (HTTP). The Common Gateway Interface (CGI) is the standard process that uses a set of rules to propagate the user’s request to the web server and respond to the user through the web interface. As CGI is a standard interface, the communication between the web server and the client’s web browser follows specified rules.
In this tutorial, we are going to send the request to the STM32 board which is acting as a server. So, the STM32 board will control the onboard LEDs based on our request.
|
|
|
Project Creation
We have created the project already in our previous post. So, I am not going to create it again. Now we have to enable the CGI from the .ioc file.
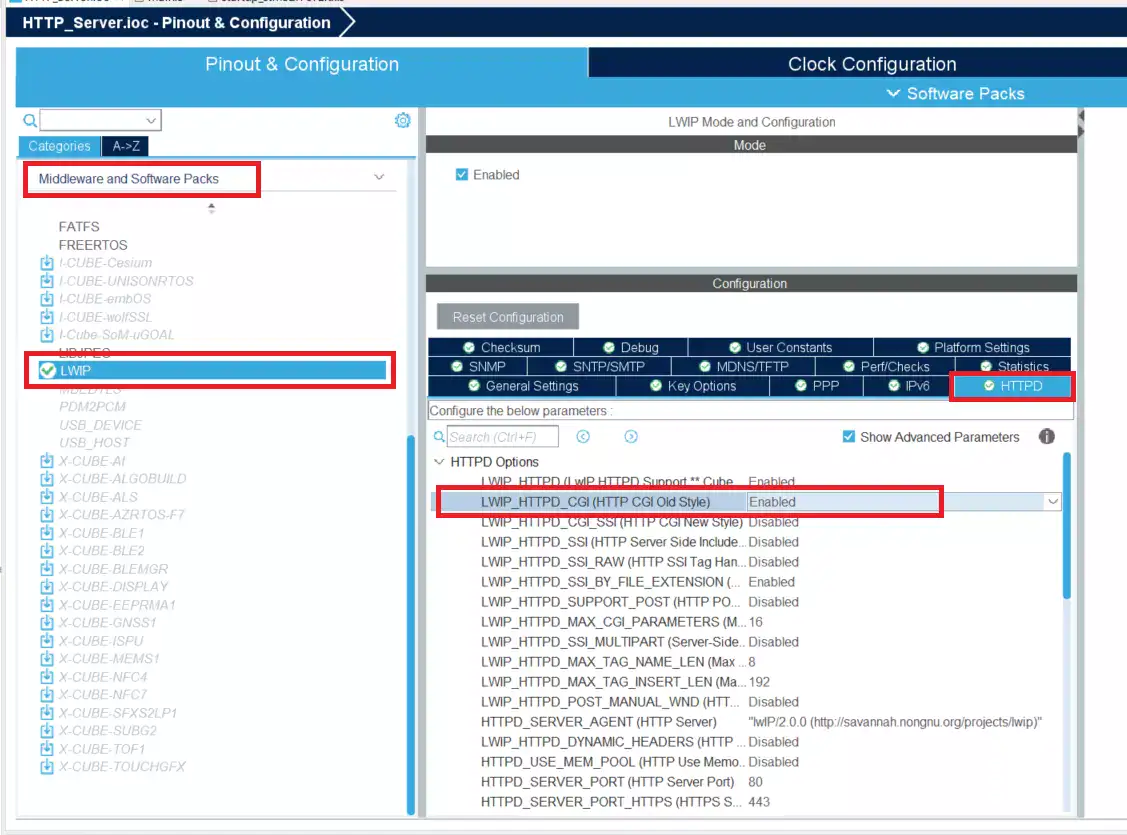
Go to Midlleware –> LWIP –> HTTPD, then enable the LWIP_HTTPD_CGI (HTTP_CGI Old Style). Please refer to the below image.
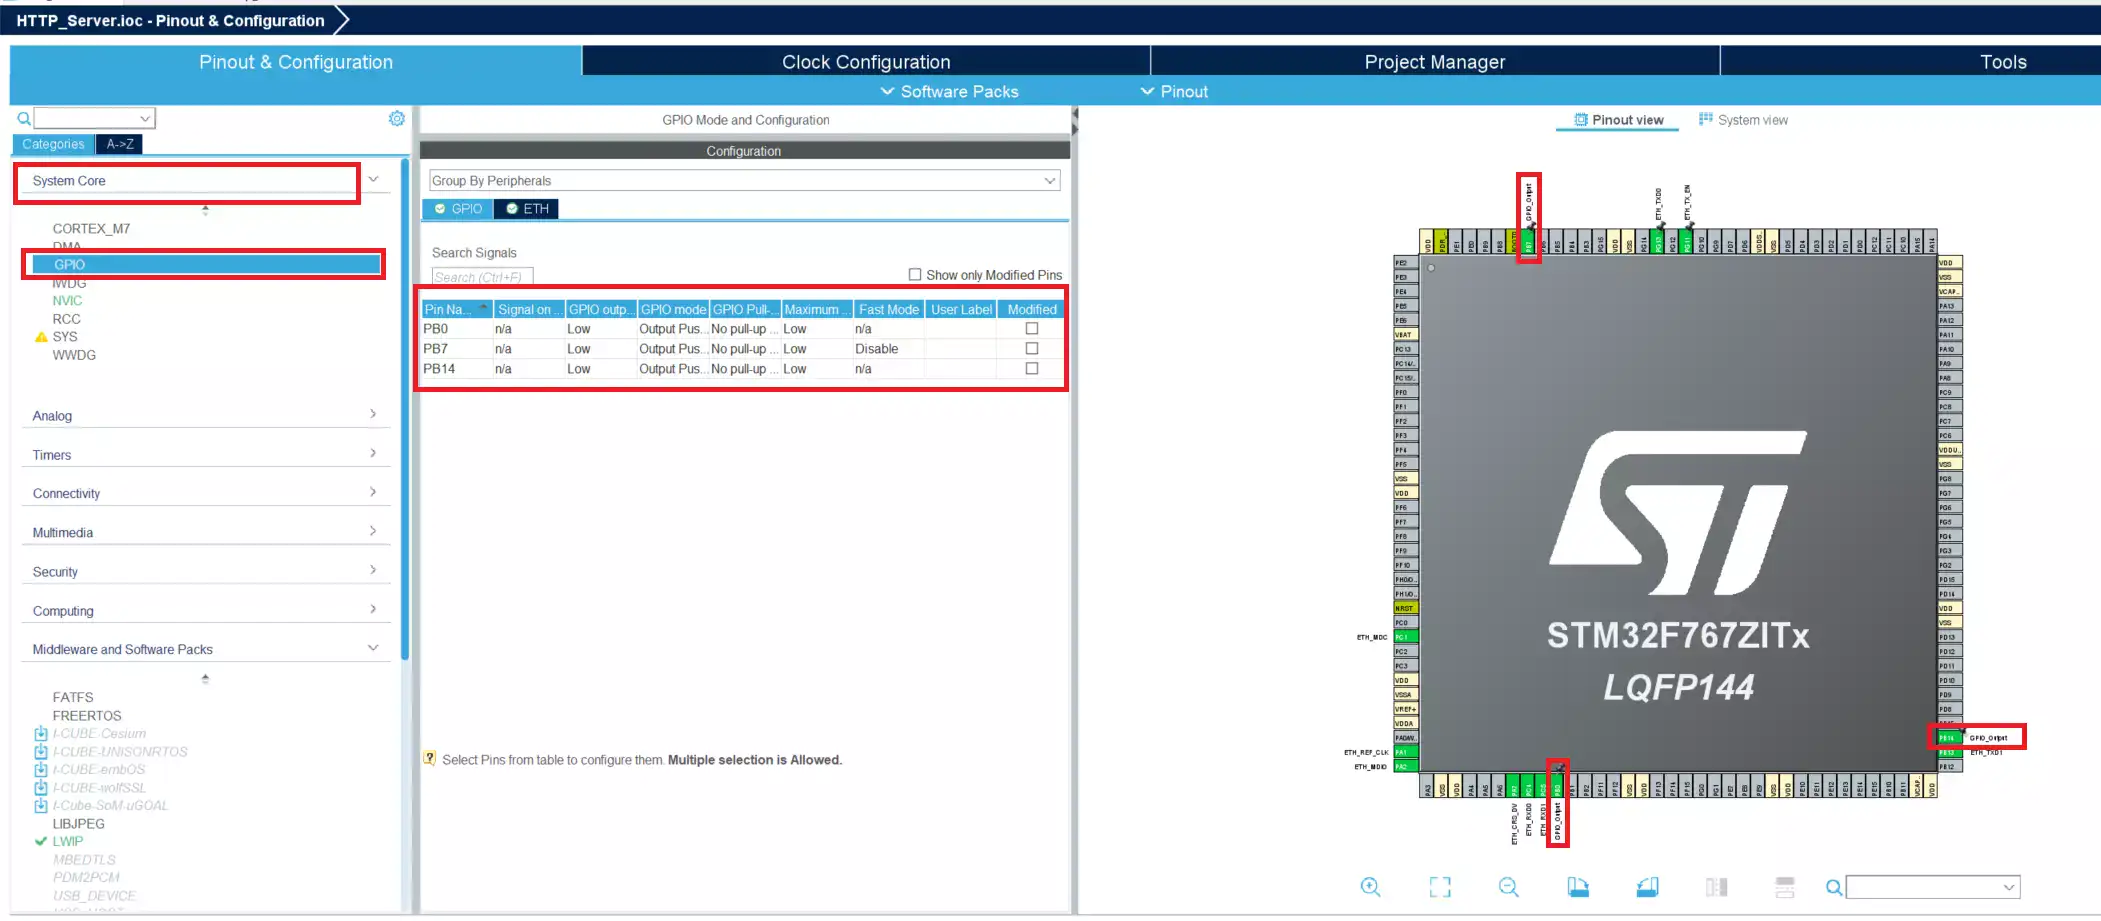
In this tutorial, we are going to control the onboard LEDs that are connected to PB0, PB7, and PB14. Enable those GPIOs as an output. Refer to the below image.
That’s it. Save this file. That will generate the code. If you have any doubts about the configuration, you can see the video explanation.
Note: This project was set up with STM32CubeMx V6.6.1 using STM32Cube FW_F7 V1.17.0.
|
|
|
Source Code – STM32 Ethernet Tutorial using CGI
HTML Code
We have used the below HTML code for our demo. The below code contains the CGI form. In that, three parameters (green, blue, red) have been created. The values of that parameters are ON or OFF. So, when we press the submit button, it will send these three parameters and their values.
<html>
<head>
   <style>
       body{
        font-size:25px;
        color: #065535;
        background-size: cover;
       }
      .wd{
          height: 100vh;
          background: linear-gradient(to right, rgba(0, 0, 0, .5), rgba(0, 0, 0, .1)), url('https://embetronicx.com/wp-content/uploads/2021/10/cropped-Logo-trans.png');
          background-repeat: no-repeat;
          padding: 100px;
      }
      .wd h1{
          text-align: center;
          font-weight: 300px;
      }
      .wd h4{
          text-align: center;
          color:#990000;
          font-weight: 100px;
      }
      .wd h5{
        text-align: center;
        font-weight: 50px;
        color:#840074;
      }
      p {
        font-size: 1.5rem;
        text-align: center;
        font-weight: 500px;
        color: #fff;
        font-weight: 700;
        margin-bottom: 1rem;
      }
      a {
        padding: 15px 20px;
        background: #52caee;
        font-size: 1rem;
        text-decoration: none;
        color: #333333;
        border-radius: .25rem;
        box-shadow: 0 0 20px rgba(255, 255, 255, 0.808)
      }
      form {
        padding: 40px 20px;
        text-align: center;
      }
      .green {
        color: #13FF00;
      }
      .blue {
        color: #002EFF;
      }
      .red {
        color: #FF0000;
      }
  </style>
</head>
<body>
  <div class="wd">
    <h1>EmbeTronicX</h1>
    <h4> <i>---Embedded Tutorials Zone---</i></h4>
    <h5> STM32F767Zi Ethernet HTTP Tutorial - Part 2 (LED Control using CGI)</h5>
    <p><a href="https://embetronicx.com/">Visit EmbeTronicX</a></p>
    <FORM ACTION="LEDControl.cgi" METHOD="GET">
    <div class="green">
      Green LED <SELECT NAME="green" SIZE=1>
      <OPTION SELECTED>ON
      <OPTION>OFF
      </SELECT>
    </div>
    <div class="blue">
      Blue LED <SELECT NAME="blue" SIZE=1>
      <OPTION SELECTED>ON
      <OPTION>OFF
      </SELECT>
    </div>
    <div class="red">
      Red LED <SELECT NAME="red" SIZE=1>
      <OPTION SELECTED>ON
      <OPTION>OFF
      </SELECT>
      <br>
    </div>
      <br>
      <input value="Send" type="submit">
    </div>
    </FORM>
  </div>
</body>
</html>
STM32 Code
Add the below code to the main.c file between USER CODE BEGIN Includes and USER CODE END Includes).
You can get the entire project code from GitHub.
/* USER CODE BEGIN Includes */
#include <string.h>
#include "lwip/apps/httpd.h"
/* USER CODE END Includes */
Add the below variables between the USER CODE BEGIN PV and USER CODE END PV. These variables are used to control the LEDs. Whenever we send the CGI script from the browser, we will set these variables based on the user input.
/* USER CODE BEGIN PV */
int GreenLED = 0;
int BlueLED  = 0;
int RedLED   = 0;
/* USER CODE END PV */
Add the below function prototype between the USER CODE BEGIN PFP and USER CODE END PFP.
|
|
|
/* USER CODE BEGIN PFP */
const char *LedControlCgiHandler(int iIndex, int iNumParams, char *pcParam[], char *pcValue[]);
/* USER CODE END PFP */
Add the below tCGI structure in the main function between the USER CODE BEGIN 1 and USER CODE END 1. This structure is used to set our CGI script name and the handler function.
  /* USER CODE BEGIN 1 */
  tCGI LED_CGI = {"/LEDControl.cgi", LedControlCgiHandler};
  /* USER CODE END 1 */
Now, we will have to initialize the HTTP and the CGI handler. So we can add the below code between the USER CODE BEGIN 2 and USER CODE END 2. This http_set_cgi_handlers() function, initialize the CGI and set the handler function.
  /* USER CODE BEGIN 2 */
  httpd_init();
  http_set_cgi_handlers(&LED_CGI, 1);
  /* USER CODE END 2 */
Add the below code to the while(1). MX_LWIP_Process() will be processing the received packets through the ethernet. And we are setting the GPIO output based on those variables.
  /* USER CODE BEGIN WHILE */
  while (1)
  {
    MX_LWIP_Process();
    HAL_GPIO_WritePin(GPIOB, GPIO_PIN_0, GreenLED );     //Green LED
    HAL_GPIO_WritePin(GPIOB, GPIO_PIN_7, BlueLED );      //Blue LED
    HAL_GPIO_WritePin(GPIOB, GPIO_PIN_14, RedLED );      //Red LED
    /* USER CODE END WHILE */

    /* USER CODE BEGIN 3 */
  }
  /* USER CODE END 3 */
Now, this is the final step. Add the below function between the USER CODE BEGIN 4 and USER CODE END 4.
/* USER CODE BEGIN 4 */
const char *LedControlCgiHandler(int index, int numParams, char *pcParam[], char *pcValue[])
{
  if(index == 0)
  {
    for(int i=0; i < numParams; i++)
    {
      if(strcmp(pcParam[i], "green") == 0)
      {
        if(strcmp(pcValue[i], "ON") == 0)
        {
          GreenLED = 1;
        }
        else
        {
          GreenLED = 0;
        }
      }
      else if(strcmp(pcParam[i], "blue") == 0)
      {
        if(strcmp(pcValue[i], "ON") == 0)
        {
          BlueLED = 1;
        }
        else
        {
          BlueLED = 0;
        }
      }
      else if(strcmp(pcParam[i], "red") == 0)
      {
        if(strcmp(pcValue[i], "ON") == 0)
        {
          RedLED = 1;
        }
        else
        {
          RedLED = 0;
        }
      }
    }
  }

  return "/index.html";
}
/* USER CODE END 4 */
This LedControlCgiHandler function is the important one that you need to understand. This function will be called by the LwIP, whenever it receives the CGI form from the client.
|
|
|
The first argument index is the number of the index in the CGI form. We have only one form, so always that value will be 0.
The second argument numParams is used to tell us how many parameters are available in the CGI form that is received. In this example, we are going to use three parameters which are used to control the three LEDs.
The third argument pcParam is the parameter name.
The fourth argument pcValue is the parameter value.
If you see our HTML code, we are sending three parameters called green, blue, and red, and their values. So, whenever we hit the submit button, the index will be 0, numParams will be 3, pcParam[0] points to green, pcValue[0] points to ON/OFF, pcParam[1] points to blue, pcValue[1] points to ON/OFF, pcParam[2] points to red, pcValue[2] points to ON/OFF. So in this function, we are comparing the string in the parameters and setting the respective variable (GreenLED, BlueLED, and RedLED).
|
|
|
MakeFsData
Now, we will convert the HTML file to fsData. Download this zip file and extract it. To run this makefsdata.pl, we need to install Perl on our machine. Download and install Perl from the official website.
Then open the command terminal and run the following command under the extracted directory.
perl makefsdata.pl
You should get the output like below and it should generate the fsdata_custom.c and fsdata.c files.
opening root directory, found the following files and all subdirectories to process:
  404.html index.html


Starting convert files to arrays process:
  Adding file: 404.html
  /404.html, Bytesread = 1745

  Adding file: index.html
  /index.html, Bytesread = 2264
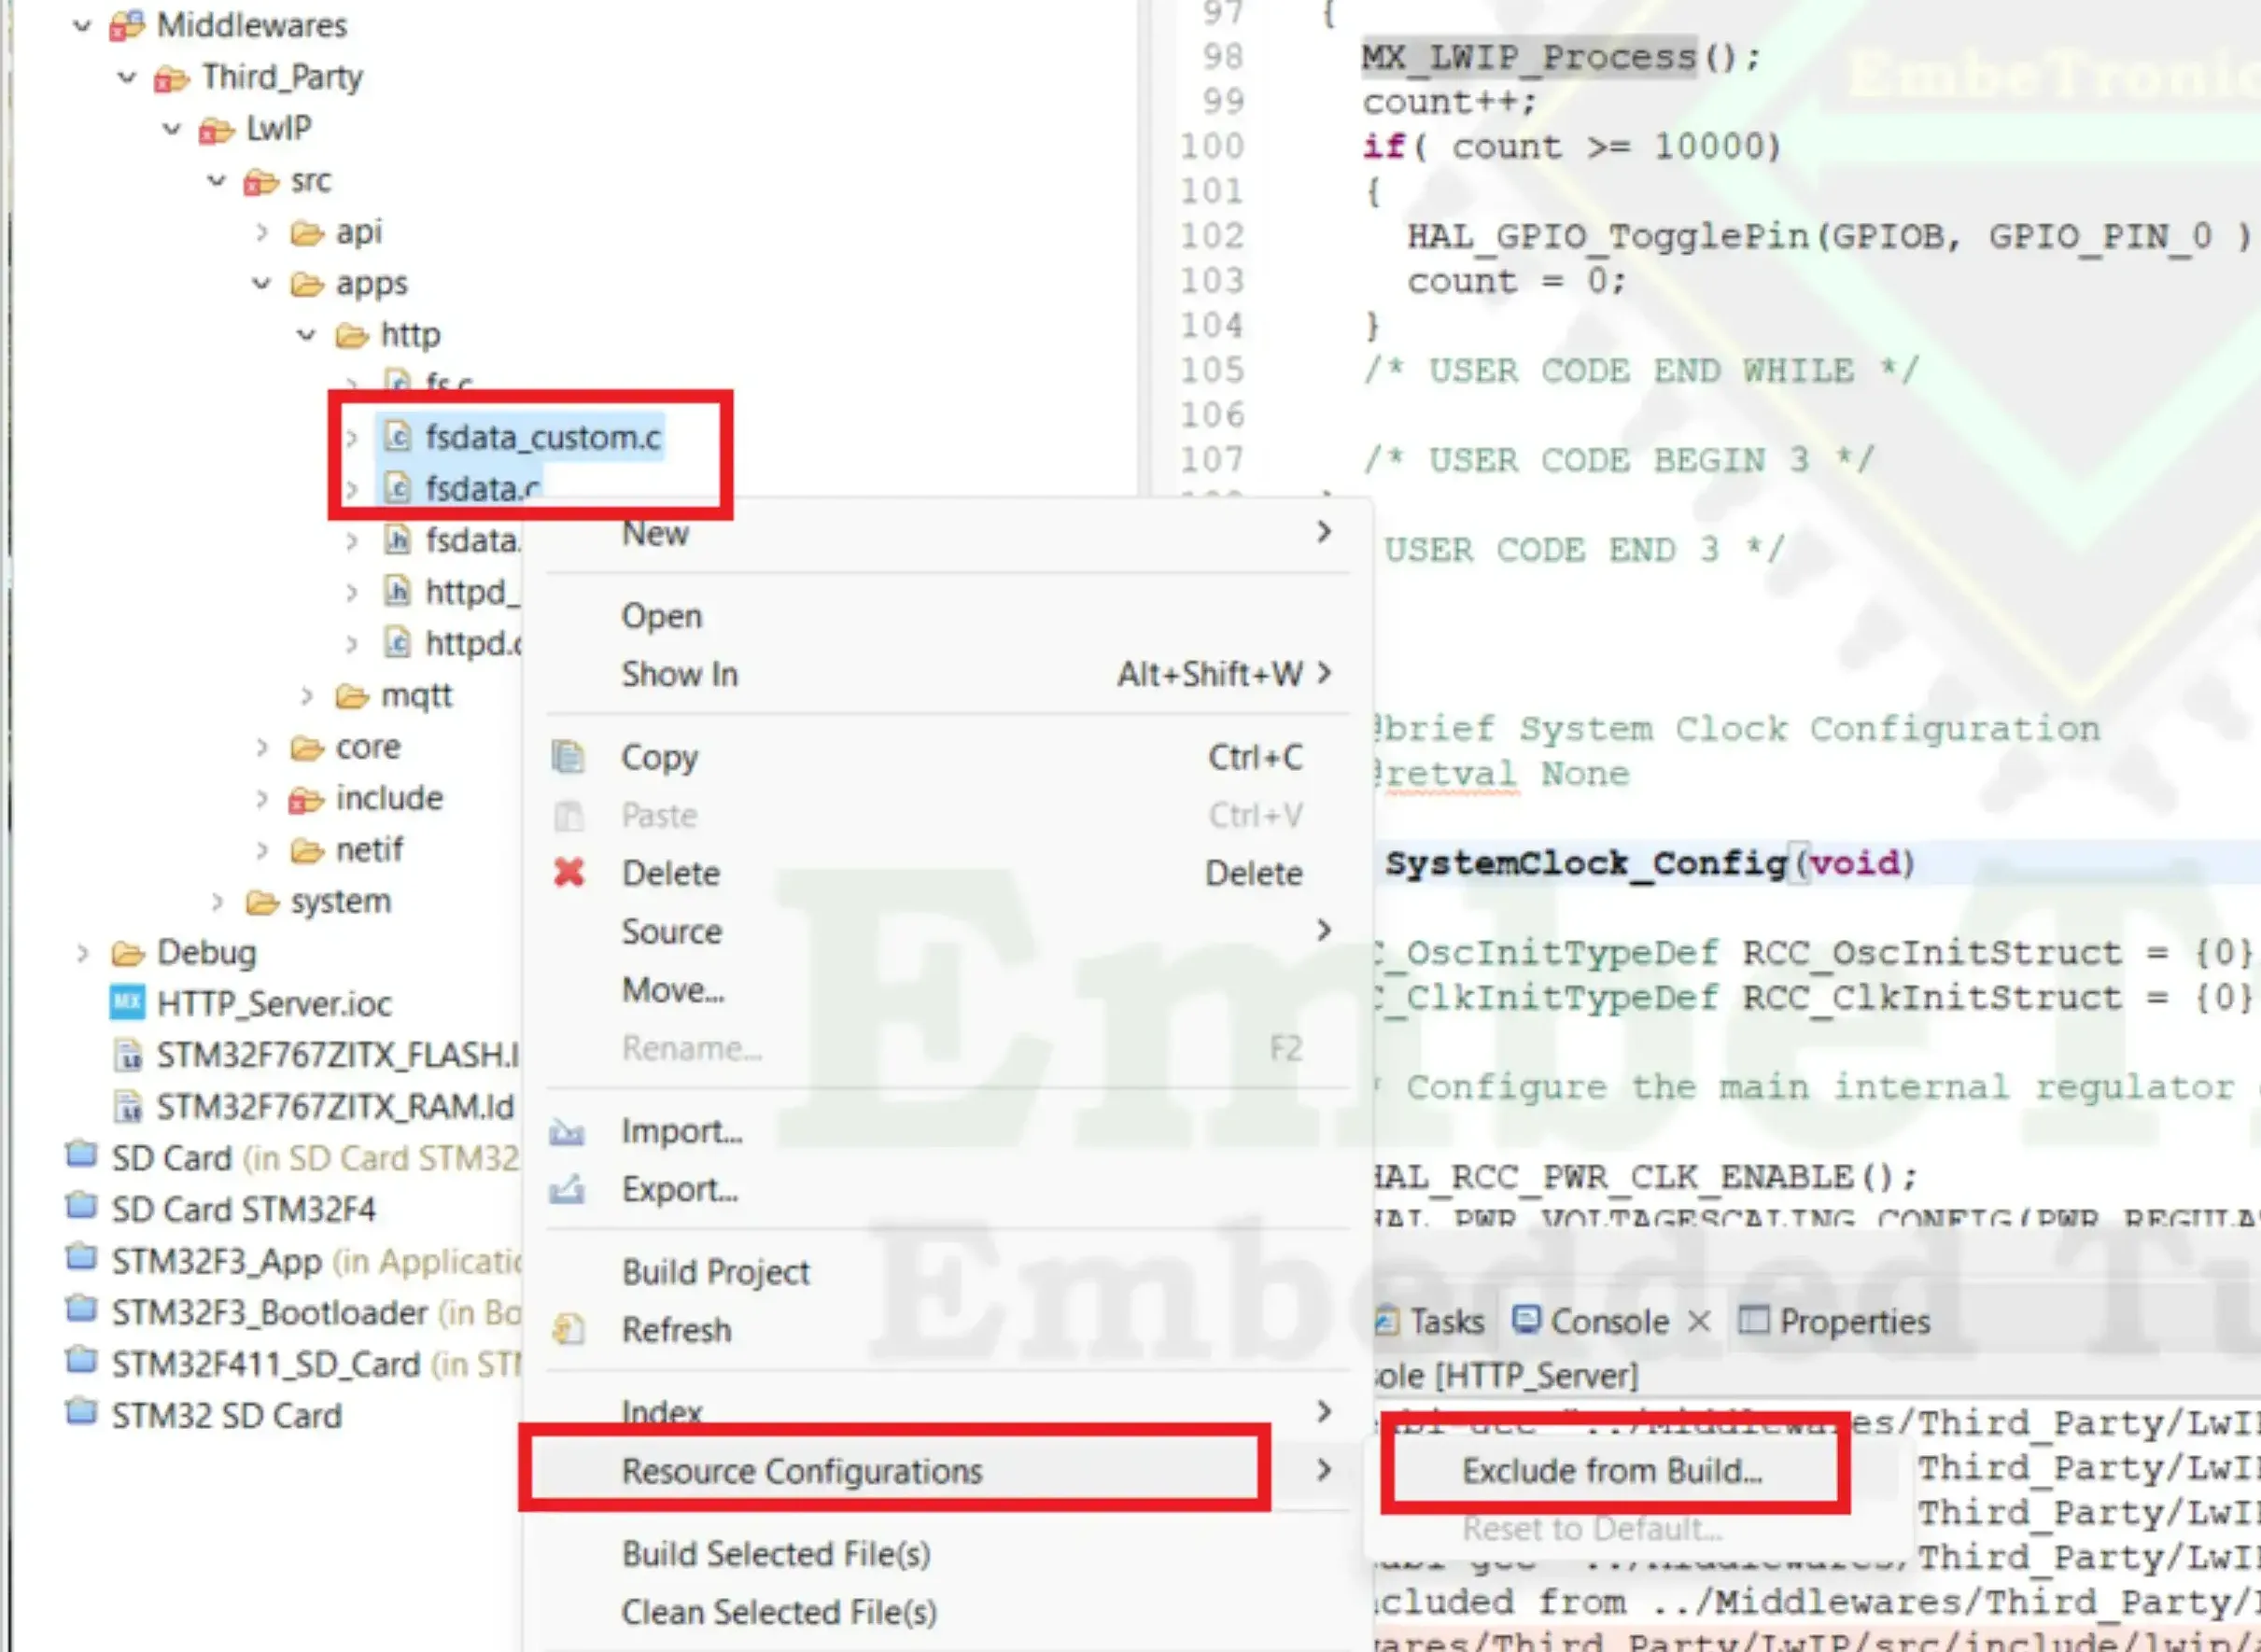
Now we have fsdata_custom.c and fsdata.c files. Copy that and add those files to the Middlewares –> Third_Party –> LwIP –> Src –> apps –> HTTP. Refer to the below image.
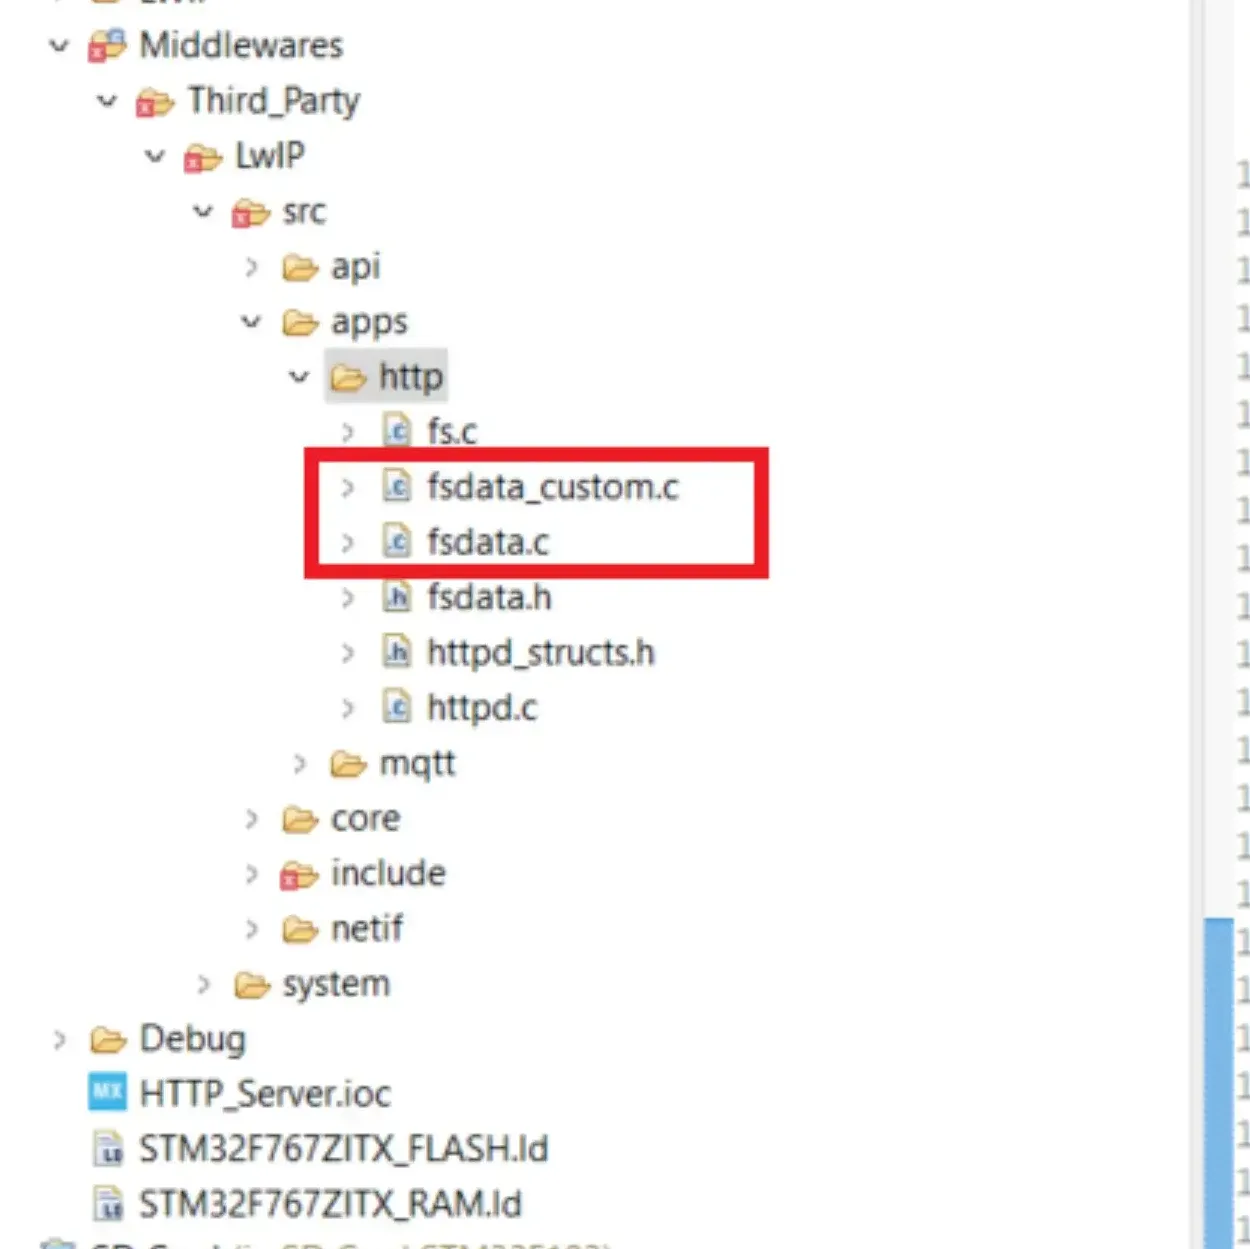
fsdata_custom.c and fsdata.cNow we will exclude those two files from the build. Select those two files and right-click. Then click Resource configurations –> Exclude from build. Refer to the below image.
|
|
|
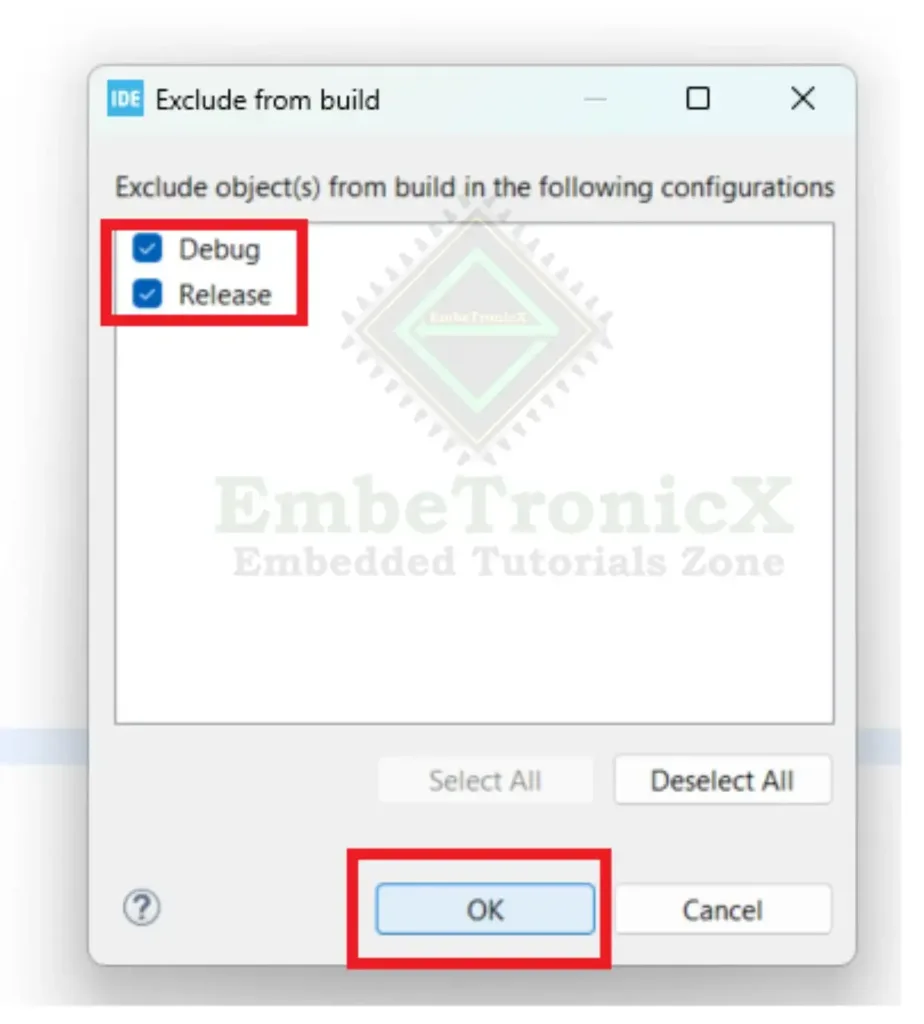
Now select Debug and Release then click OK. Refer to the below image.
That’s it. Now build the project and Flash the bin file to the STM32F767Zi.
Connection – STM32 Ethernet CGI
Connect the LAN cable (RJ45 cable) to the STM32F7 and Router. Now, ensure your machine or mobile is connected to the same router through wifi or ethernet cable.
STM32 Ethernet Tutorial Demo
Now restart the STM32F7 Necleo. When you access this “192.168.1.25” from your browser, you should see the webpage with Green, Blue, and Red LED options. Turn ON the LEDs you want and hit the Submit button. Now those LEDs should be turned on in the STM32 Necleo board. Please check the below video demo.
Video Explanation
Please read the other STM32 Tutorials. In our next article, we will discuss about STM32 DMA.
|
|
|
You can also see the below tutorials.
Embedded Software | Firmware | Linux Devic Deriver | RTOS
Hi, I am a tech blogger and an Embedded Engineer. I am always eager to learn and explore tech-related concepts. And also, I wanted to share my knowledge with everyone in a more straightforward way with easy practical examples. I strongly believe that learning by doing is more powerful than just learning by reading. I love to do experiments. If you want to help or support me on my journey, consider sharing my articles, or Buy me a Coffee! Thank you for reading my blog! Happy learning!
