This is the Series of tutorials on STM32 Microcontroller. The aim of this series is to provide easy and practical examples that anyone can understand. In this tutorial, we will see how to create a new project for STM32 in Keil IDE.
You can also read, the STM32 GPIO tutorial, Getting Started with STM32 RTOS, LPC2148 Keil IDE installation, 8051 project creation, and 8051 Keil installation.
Table of Contents
Installation of Keil IDE
The very first thing is, we need to install the Keil IDE MDK 5.25 or later. MDK 5 uses Software Packs to distribute processor-specific software, examples, and middleware. MDK 5 is installed and the Packs you need are downloaded from the web. They can also be imported manually. You can create your own Packs.
- You can download the MDK5 at www.keil.com/mdk5/install or www.keil.com/mdk5/525.
- Install MDK into the default folder. You can install it into any folder, but this tutorial uses the default C:\Keil_v5
µVision Software Packs Download and Install
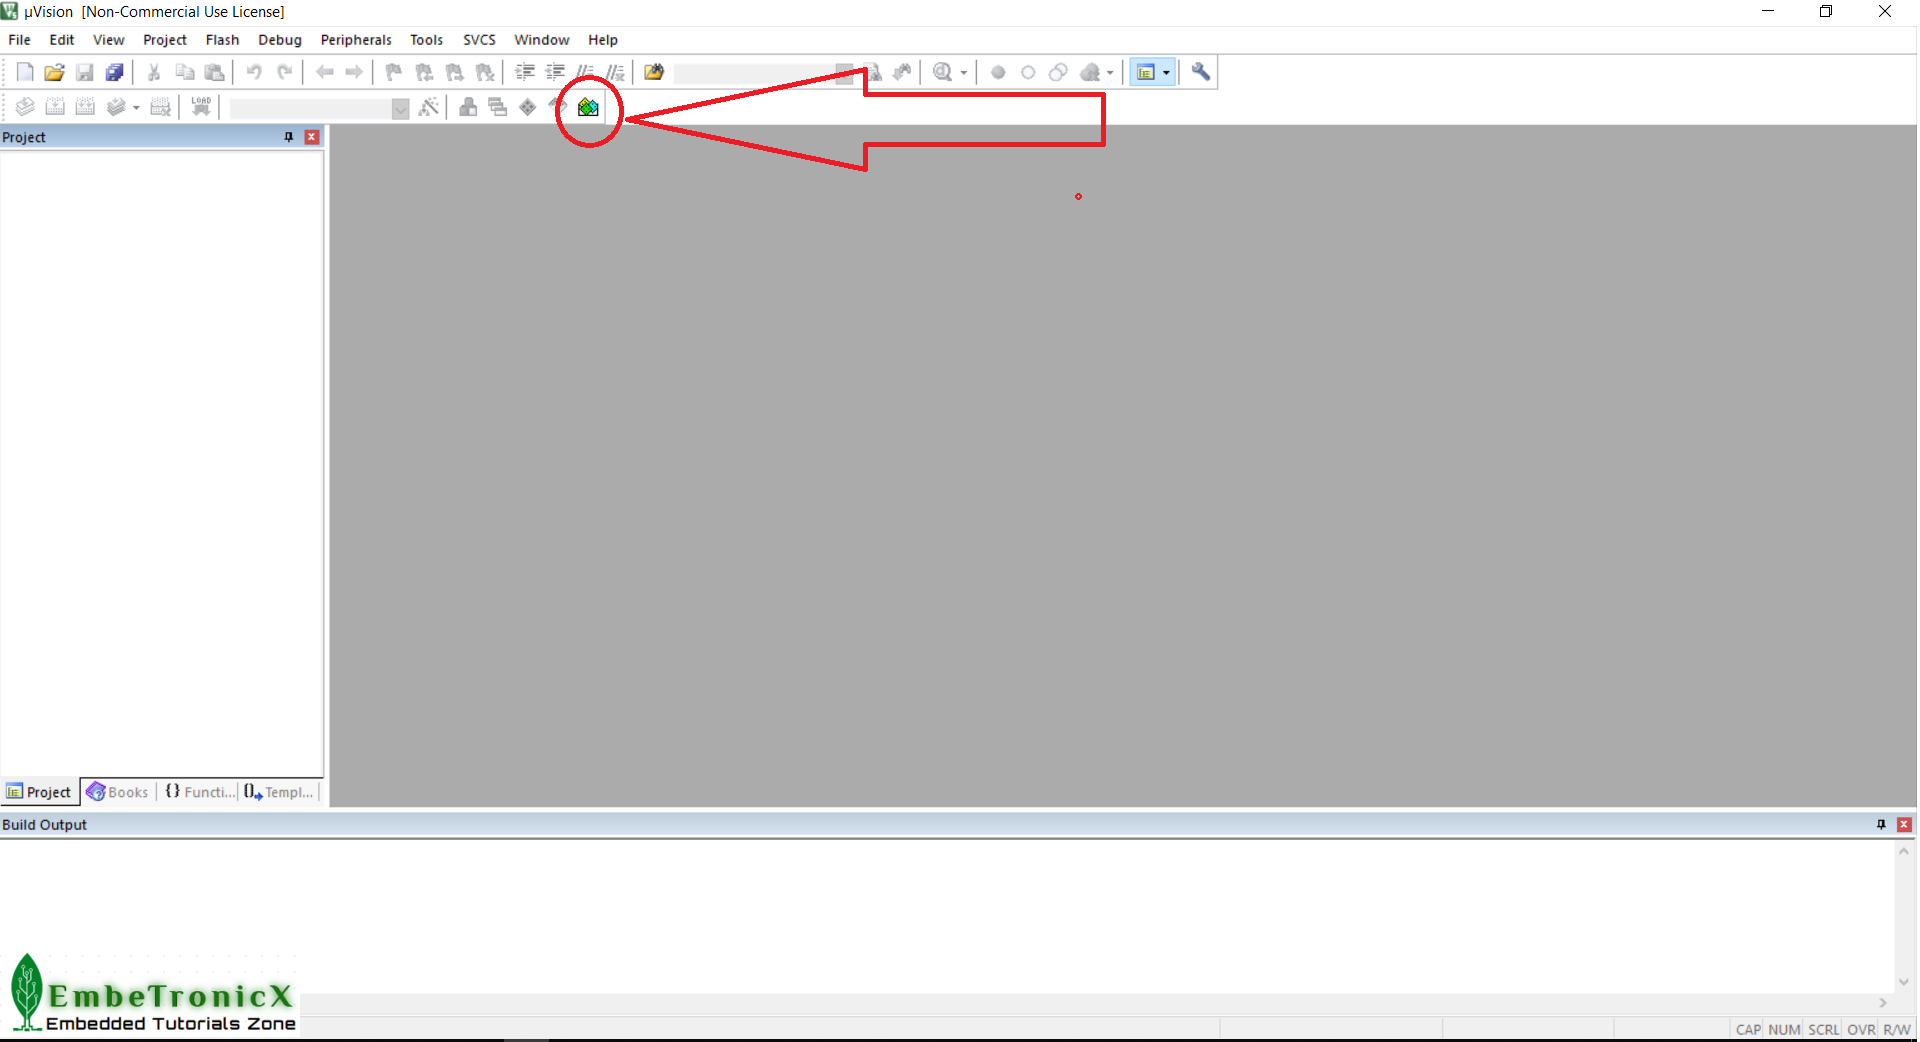
- Open the Pack Installer by clicking on its icon: refer to the below image.
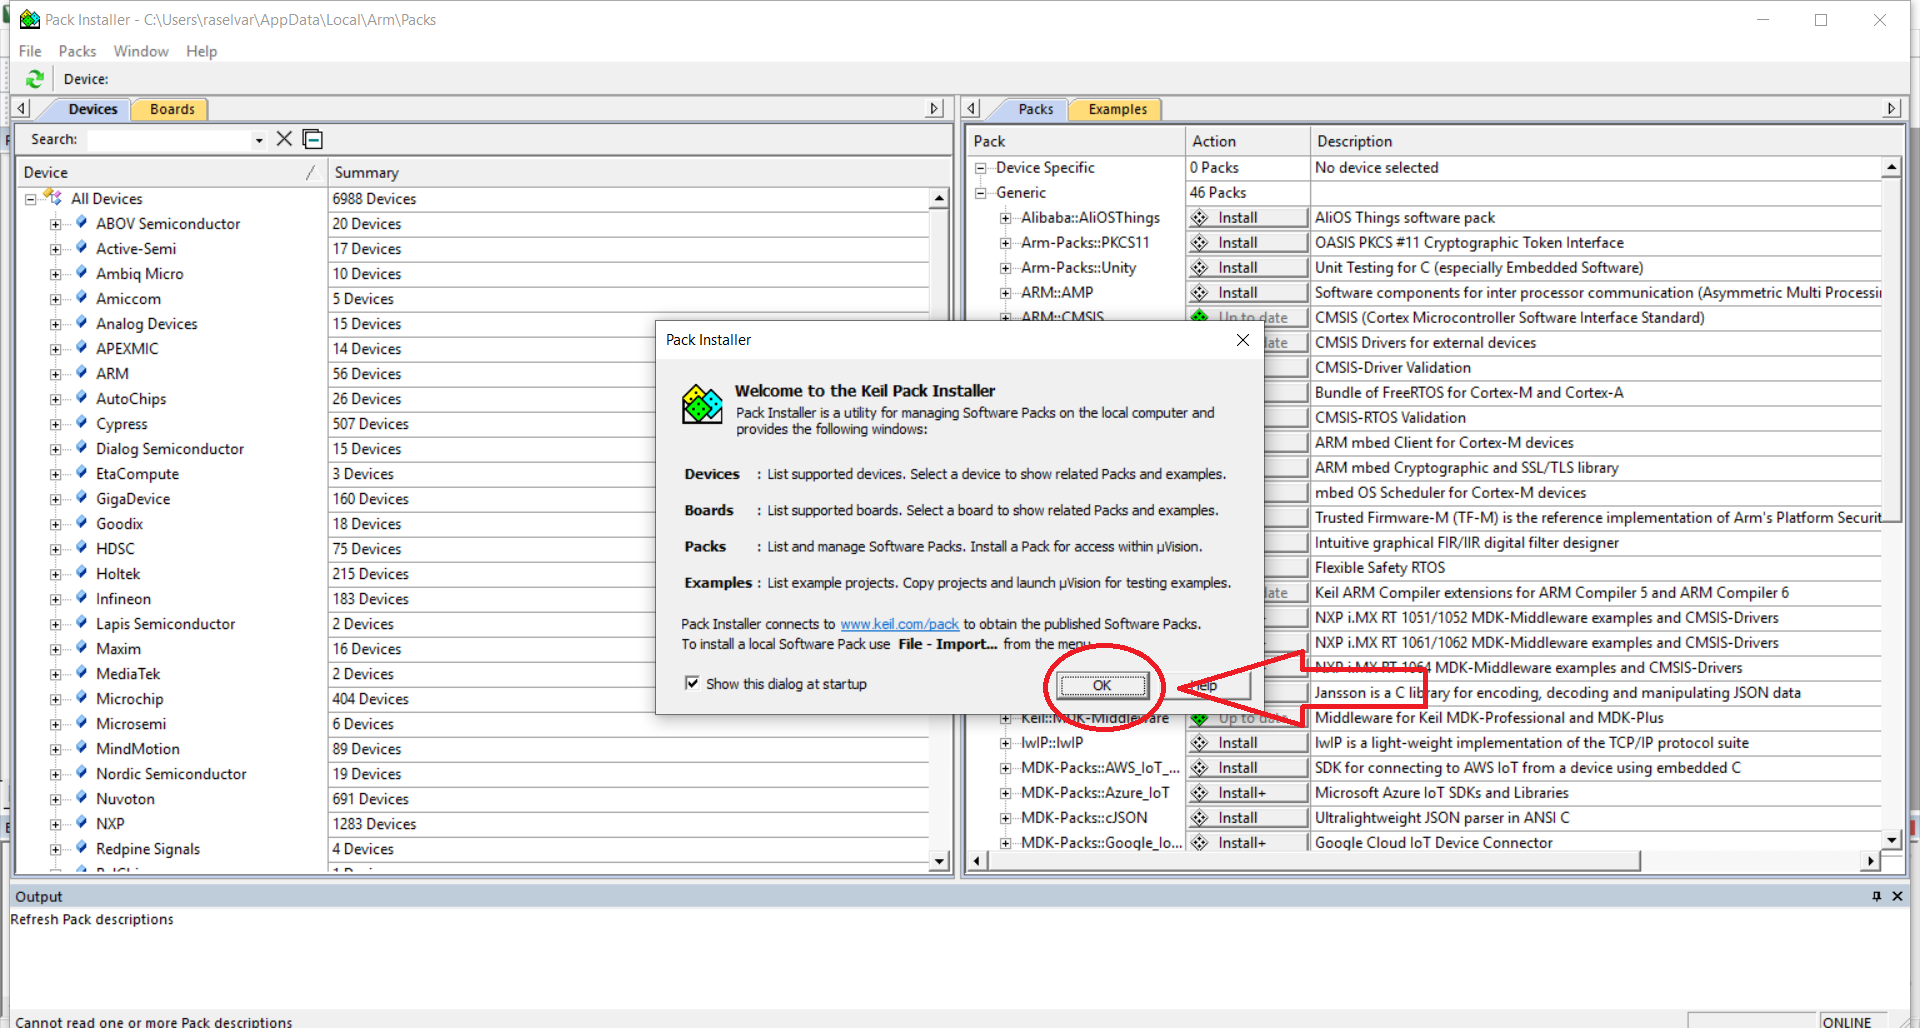
- A Pack Installer Welcome screen will open. Read and close it.: refer to the below image.
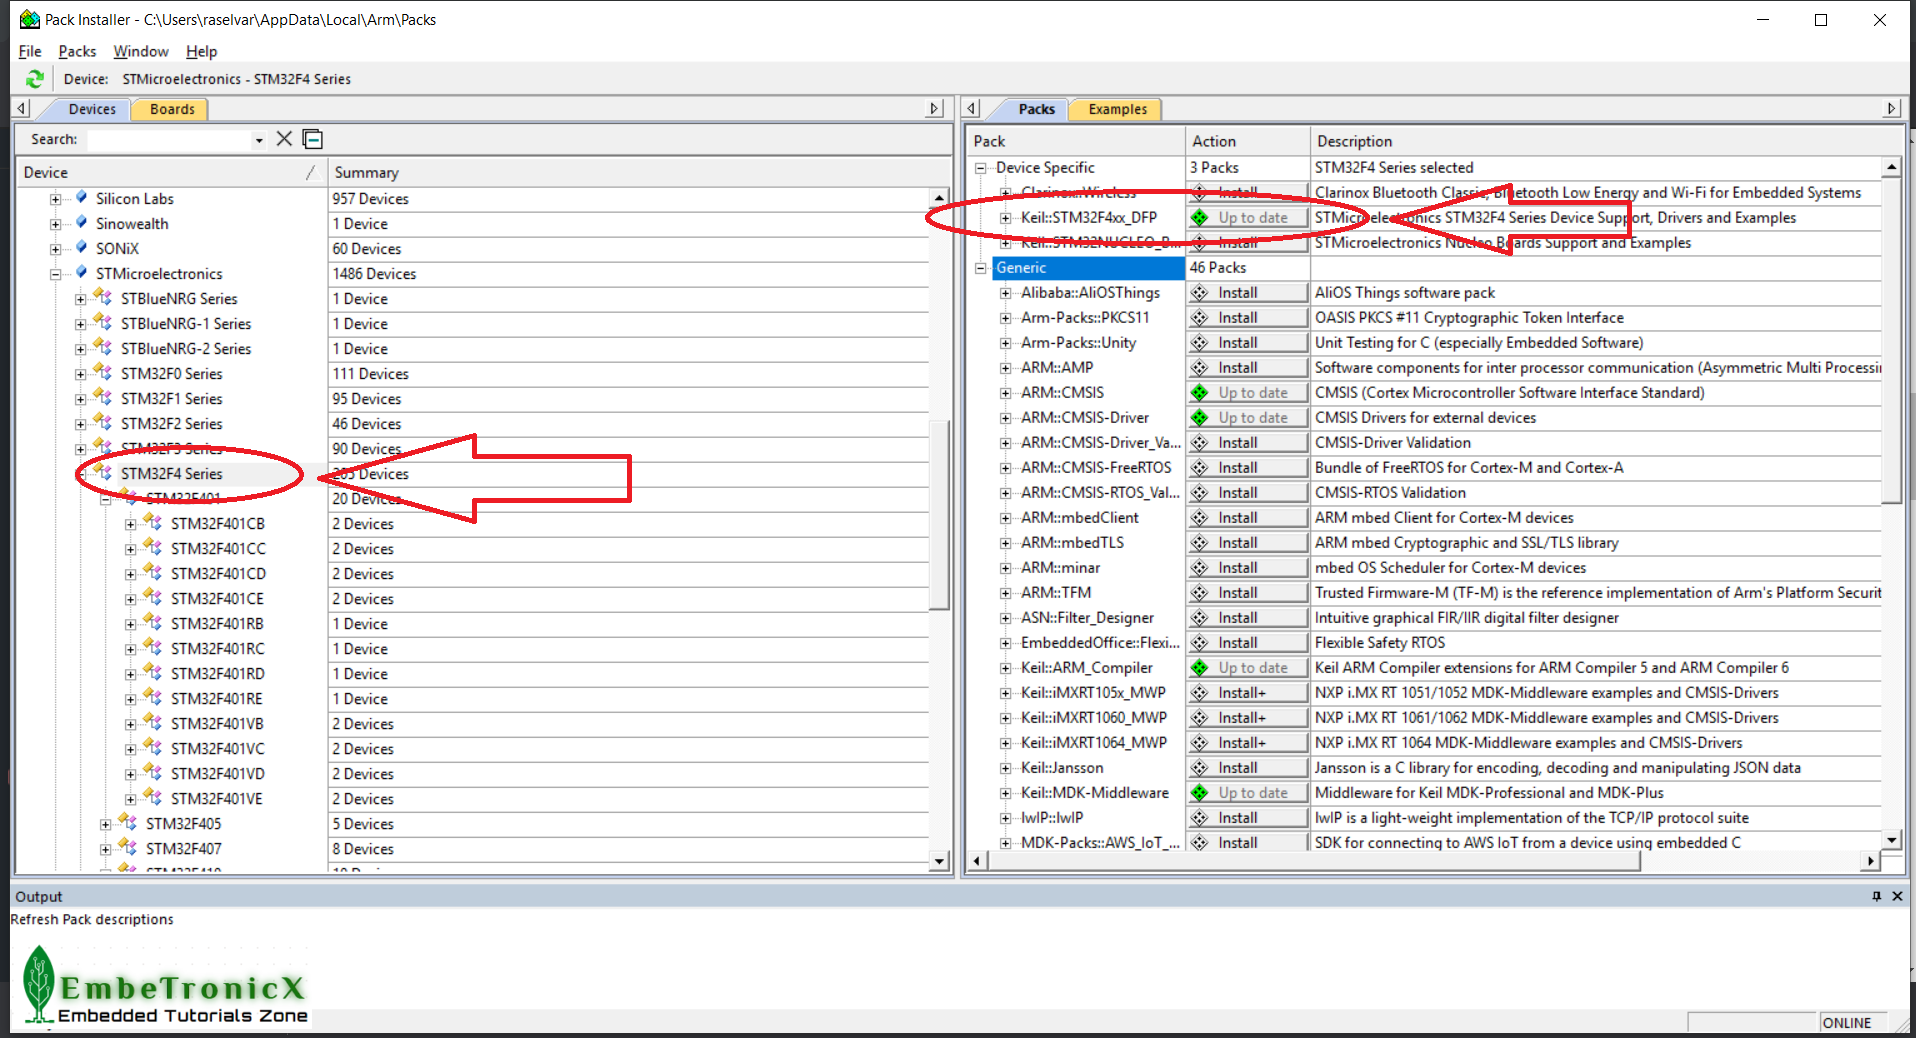
- In our STM32 tutorials, we are going to use STM32F401VE. So, select the Devices tab, Select STM32F4 Series as shown below: This will filter the Packs list. Install the Keil:STM32F4xx_DFP. As I have already installed it, it shows as Up to date instead of install.
As of now, we have installed the required software. Now let’s create the new project for STM32.
Creating a New project for STM32
- Click on the Project/New µVision Project. Refer to the below image.

- Create a new folder and provide the desired project name and click the save button in the window as shown below image. I called it the first_project. You can name anything.

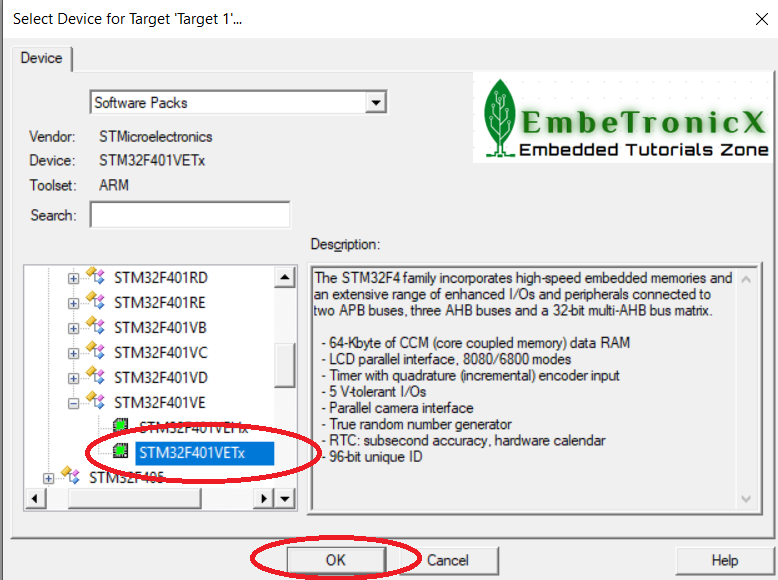
- As soon as you click on Save, the next window opens. There you need to select your device which is STM32F401VE.
- Expand STMicroelectronics, then STM32F4 Series, then STM32F401, then STM32F401VE, and then finally select STM32F401VETx as shown here: Then Click OK.
- The Manage Run-Time Environment window shown below opens.

- Select STM32F4-Discovery as the BSP as shown below.

- Expand CMSIS and select Core. Expand Device and select Startup as shown below.
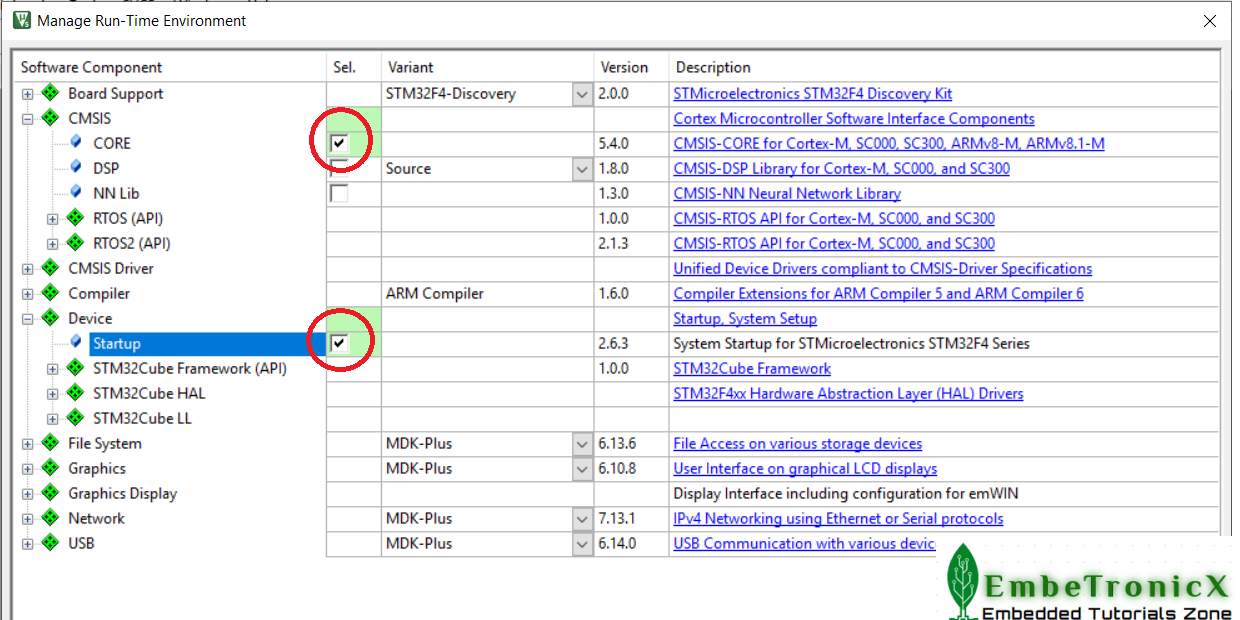
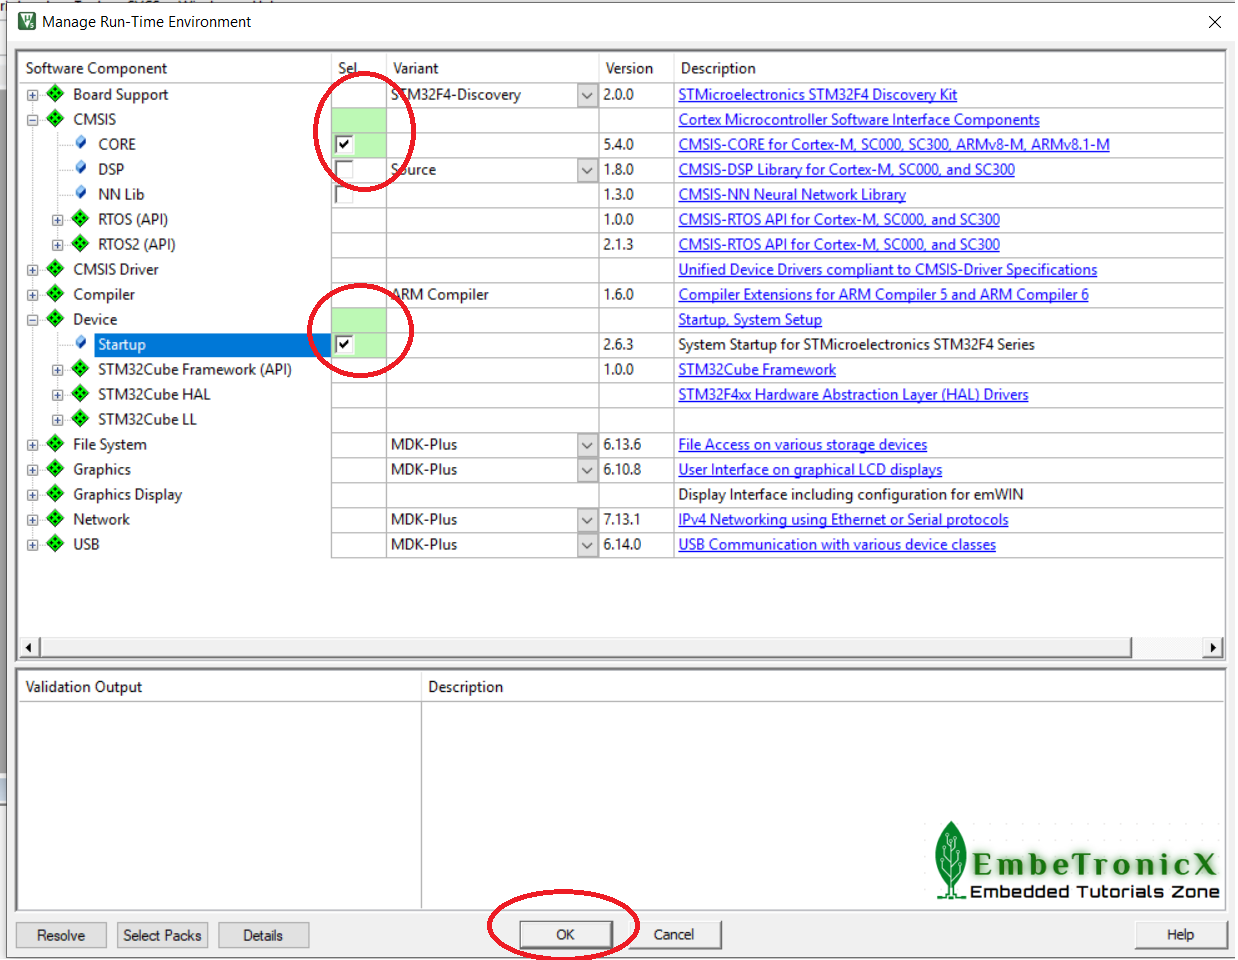
- They will be highlighted in Green indicating there are no other files needed. Click OK as shown below.
- You now have a new project list as shown below: The appropriate CMSIS files you selected have been automatically entered and configured.
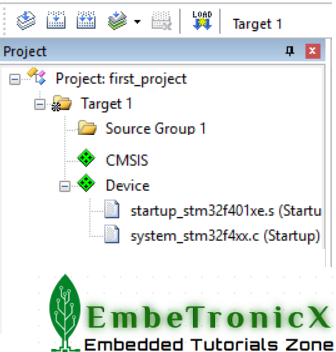
- You have created a blank µVision project using MDK 5 Software Packs. All we need to do now is add our own source files.
- Right-click on Source Group 1 in the Project window and select Add New Item to Group ‘Source Group 1’.Refer to the below image.

- Highlight the upper-left icon: C file (.c). And enter your source file’s name. I called it as
main.c. Please refer to the below image.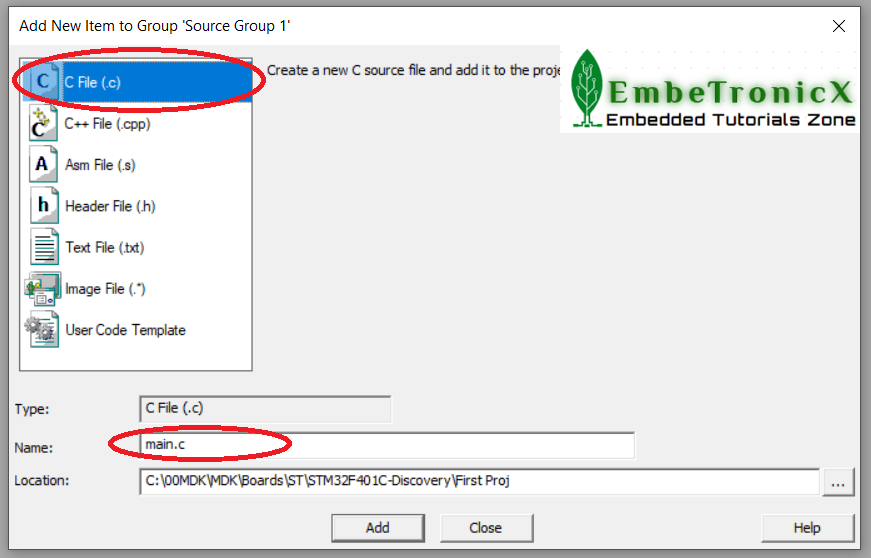
- Click on Add to close this window.
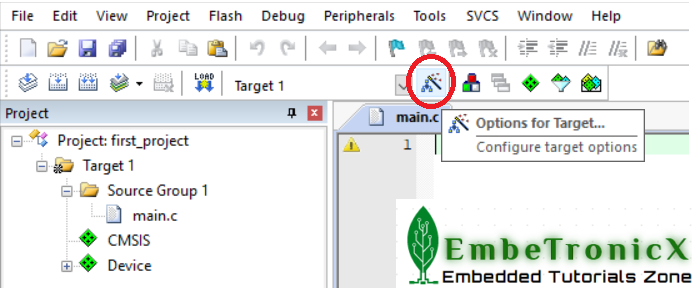
- Now click on the “Options for Target” button as shown below:
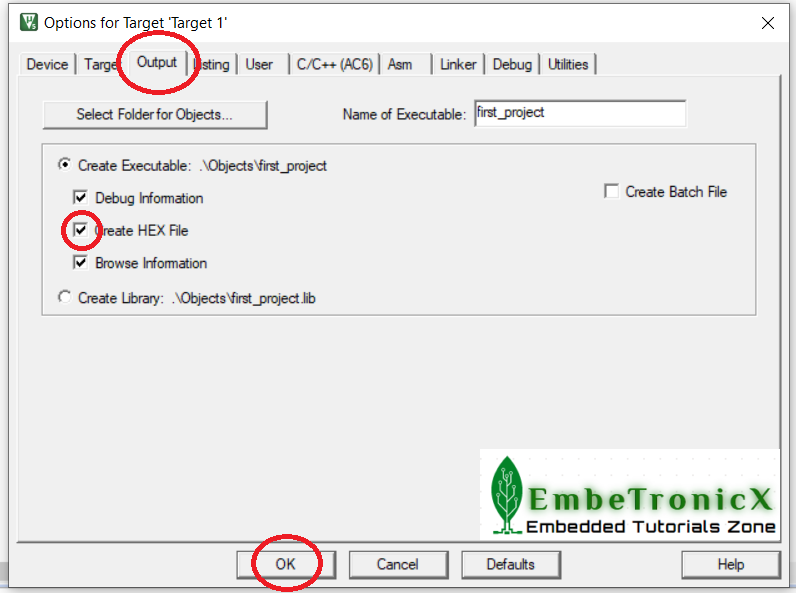
- Click the Output tab and select “Create HEX file” as the below image. Then click OK.
- Now we have added the new file to our project. We can save our project by Clicking on File/Save All. You can add your source to that file. Like this, you can add as many files as you want.
This is pretty straightforward. In our next tutorial, we will see the GPIO of STM32 with an example.
|
|
|
Please read the other STM32 Tutorials.
You can also read the below tutorials.

Embedded Software | Firmware | Linux Devic Deriver | RTOS
Hi, I am a tech blogger and an Embedded Engineer. I am always eager to learn and explore tech-related concepts. And also, I wanted to share my knowledge with everyone in a more straightforward way with easy practical examples. I strongly believe that learning by doing is more powerful than just learning by reading. I love to do experiments. If you want to help or support me on my journey, consider sharing my articles, or Buy me a Coffee! Thank you for reading my blog! Happy learning!


