This is the STM32 RTOS (RTX-CMSIS) series. The aim of this series is to provide easy and practical examples that anyone can understand. Now in this tutorial, we are going to see “Getting started with STM32 RTOS – Project setup with Keil CMSIS“.
Please read the other STM32 Tutorials.
You can also read the STM32 Keil project, STM32 GPIO tutorial without RTOS, 8051 Keil project, and LPC2148 Keil project.
Table of Contents
Getting started with STM32 RTOS
Requirement
- Keil IDE – Download here.
Download Software Packs
The below procedure will take you through the necessary steps to create a CMSIS-RTOS based project.
1. Install the Keil MDK533 which has been downloaded by using the above link.
|
|
|
2. After installing the Keil IDE, please open the Keil IDE.
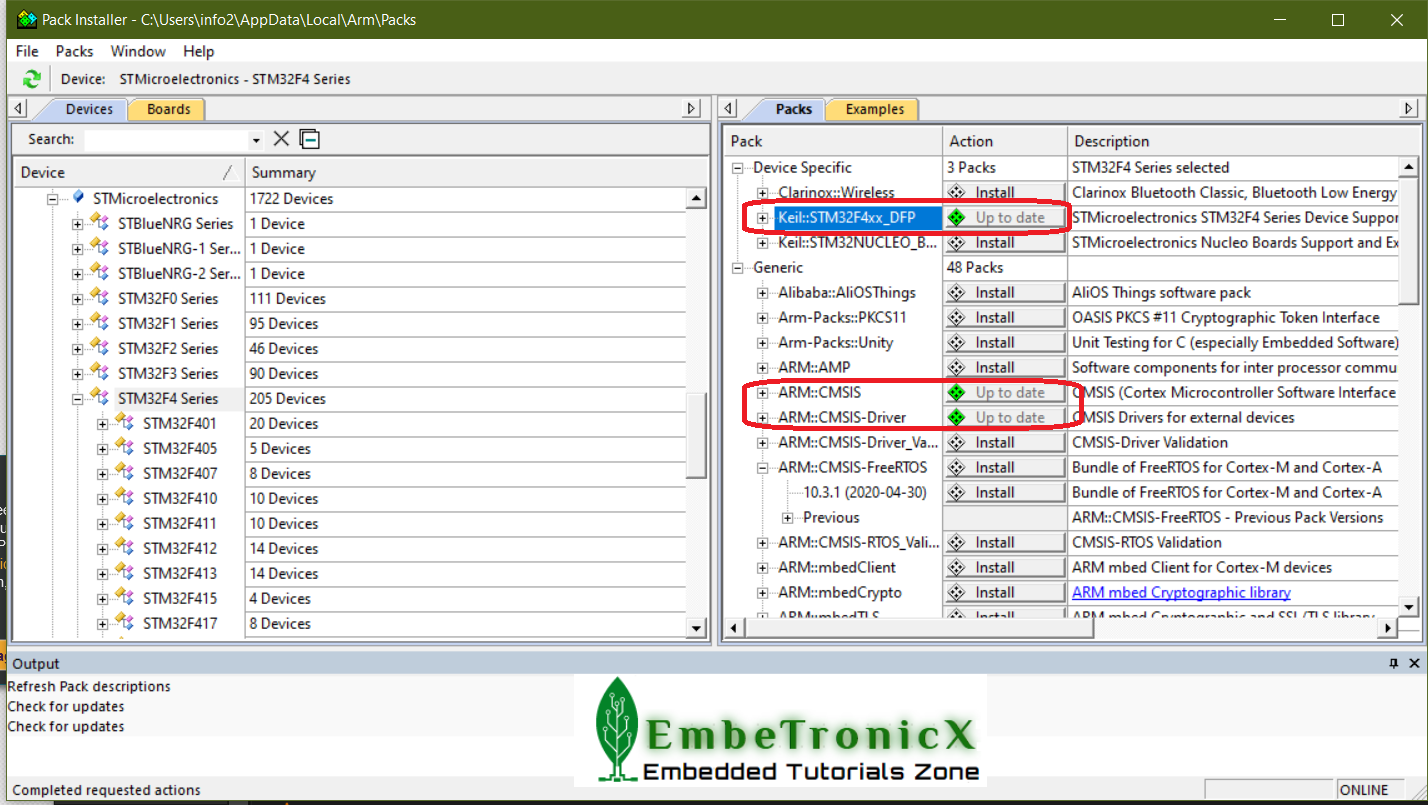
3. Now we will install the required software packs. Open the Installer. Refer to the below image.
4. Then install the Keil::STM32F4xx_DFP, ARM::CMSIS, ARM::CMSIS-Driver. Refer to the below image.
|
|
|
Setup Keil
5. After you installed the required software packs, start μVisionand select Project → New μVision Project. Refer to the below image.
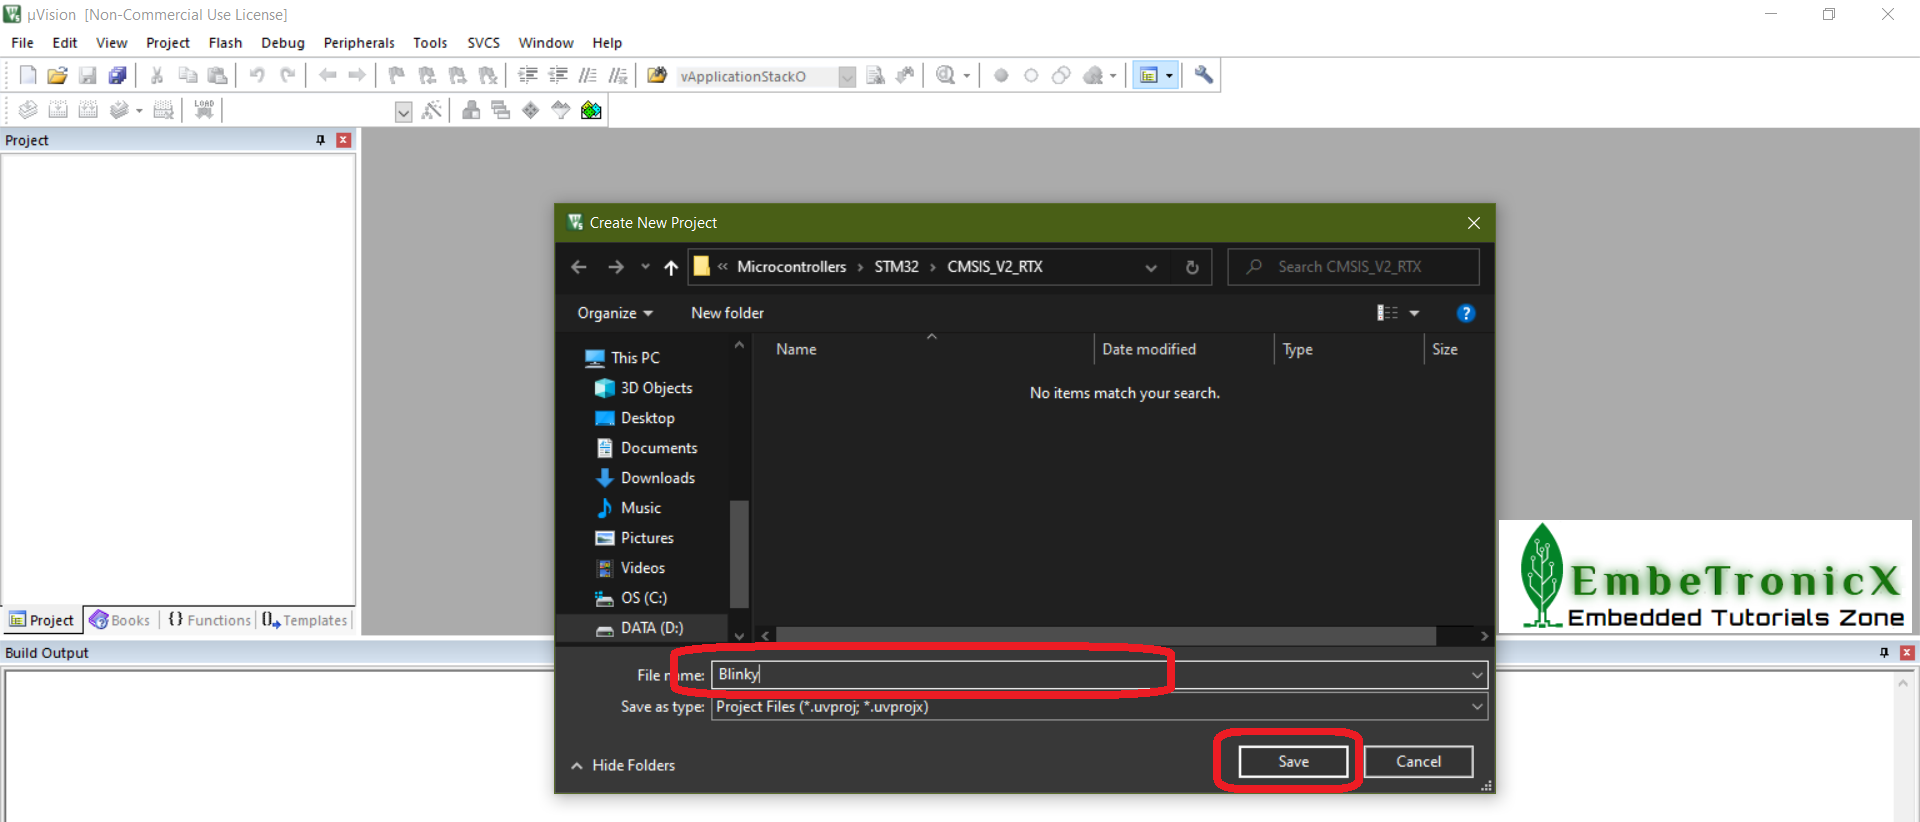
6. Select the directory where you want to save the project files and give the project name and click save. Please refer to the below image.
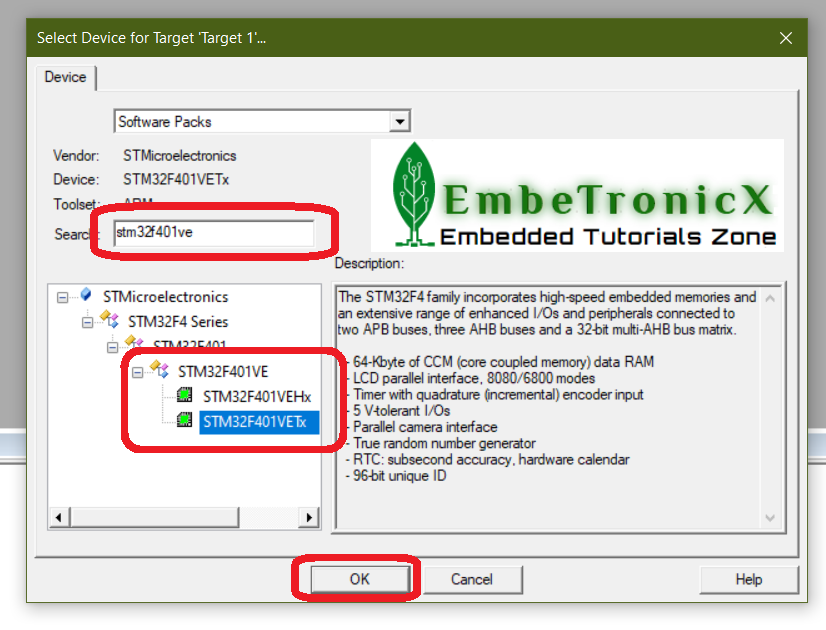
7. Then Select Device for Target ‘Target 1’ pop-up will open. There enter the stm32f401ve in search and select the STM32F401VETx. After that click OK. Please refer to the below image.
|
|
|
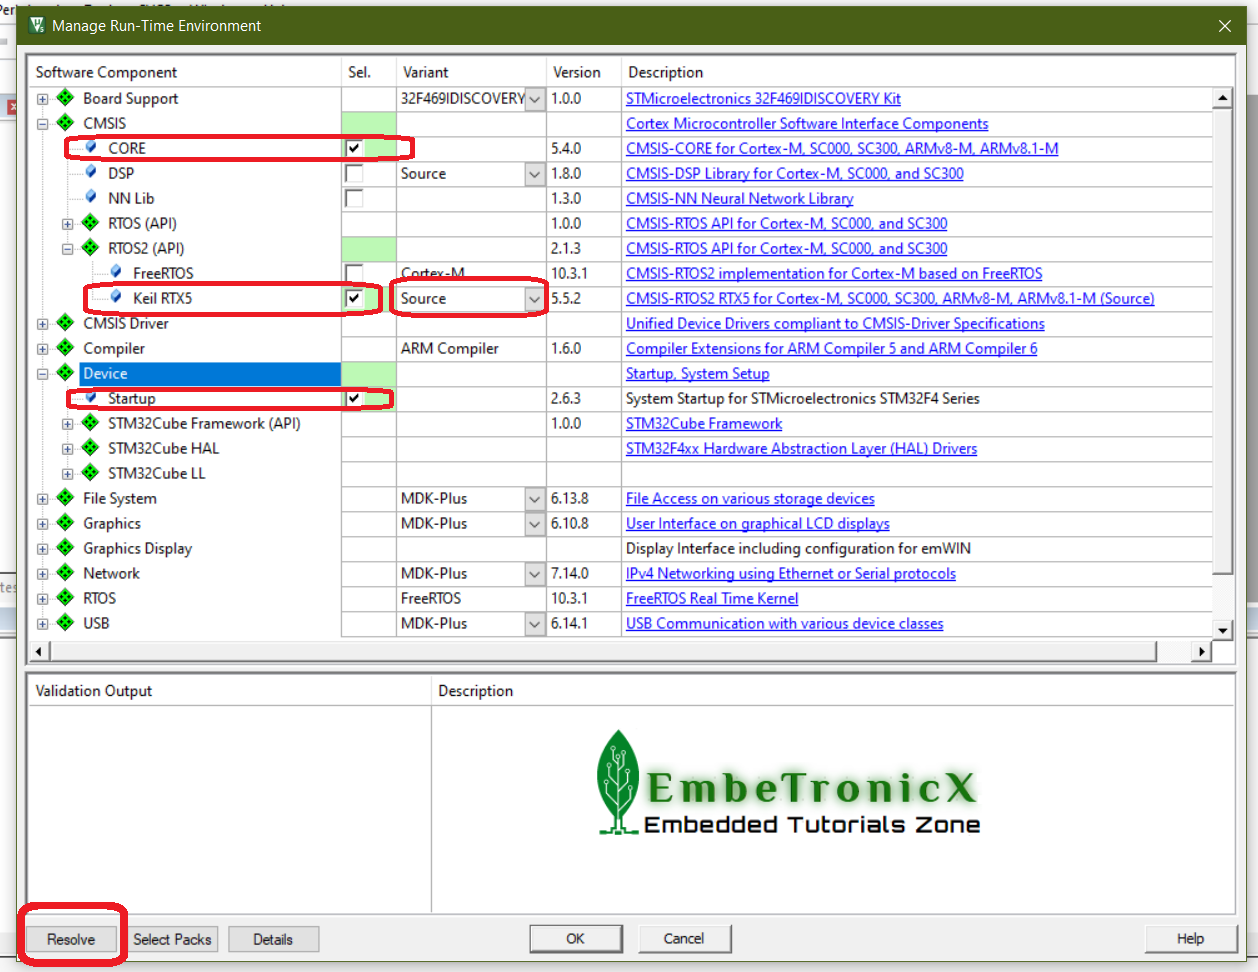
8. Now ManageRun-Time Environment will open. There select the CMSIS → CORE, RTOS2 → Keil RTX5, Click the dropdown and select the Source, Device → Startup. If you see any conflicts, then please click the Resolve button down. Please refer to the below image.
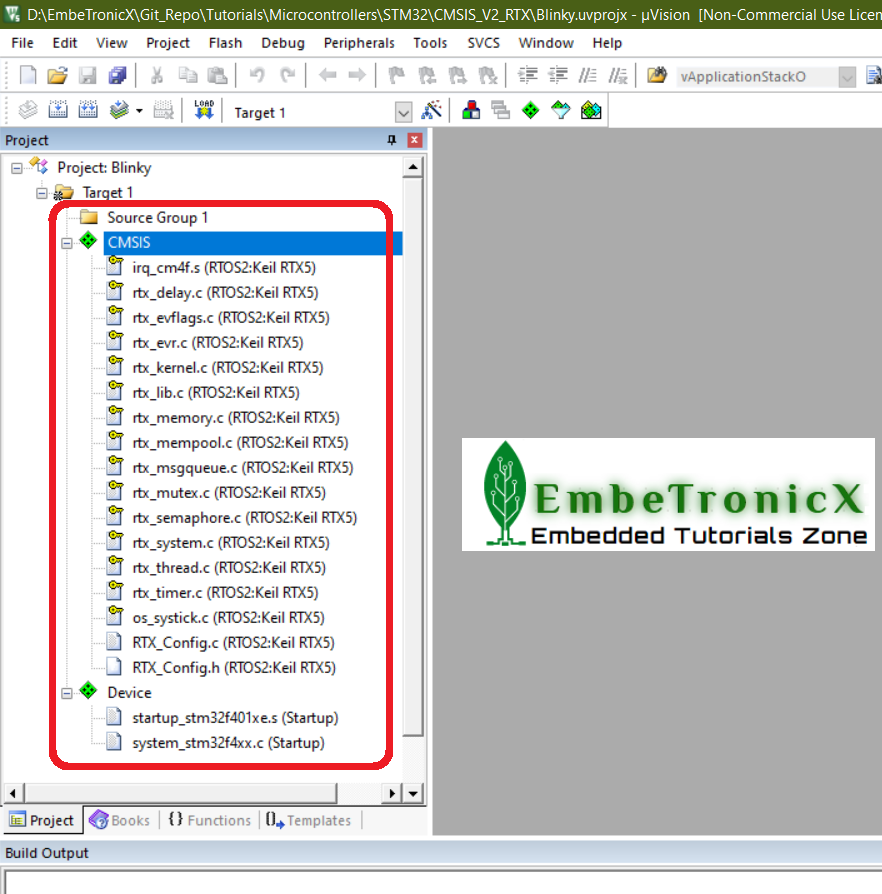
9. The below-shown files should be created now.
|
|
|
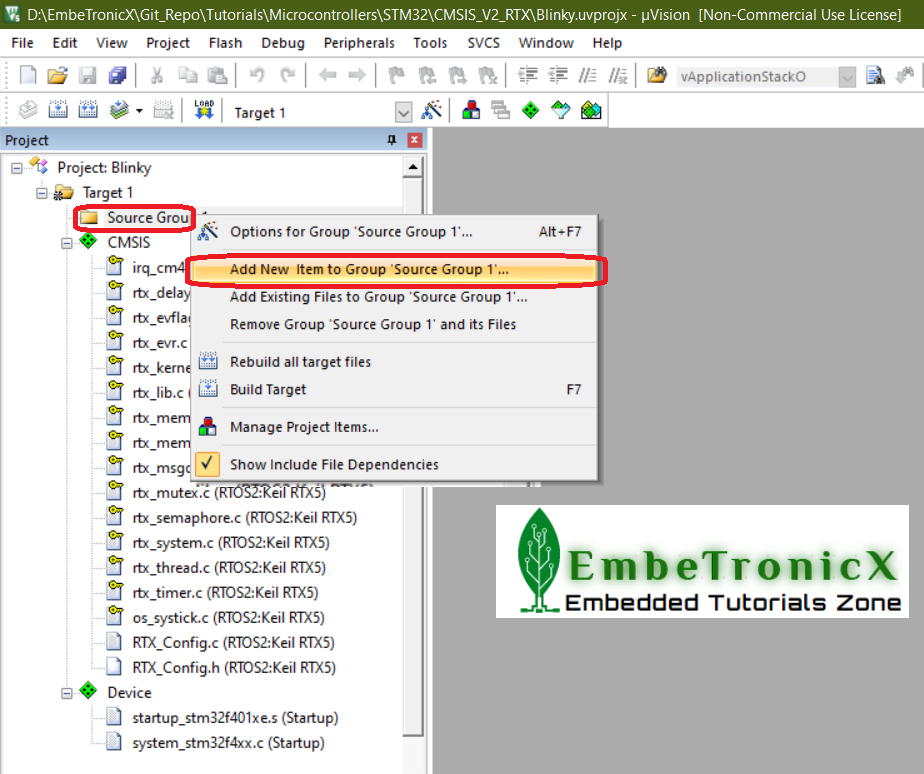
10. As of now, we have created the project. Now we will create a source file. Right-click on the Source Group and click Add New Item to Group ‘Source Group 1’. Please refer to the below image.
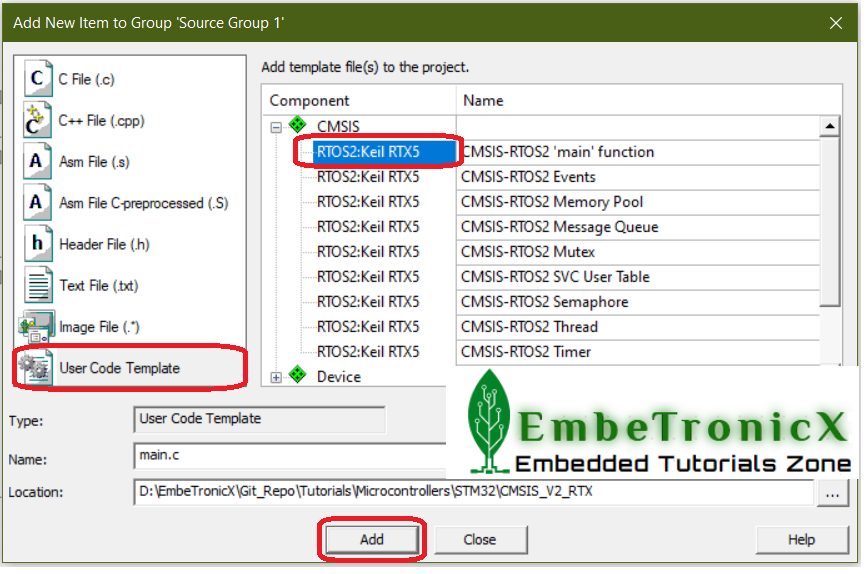
11. Then select User Code Template and RTOS2:Keil RTX5 then click Add. You can create your custom C file by clicking C File(.c). Please refer to the below image.
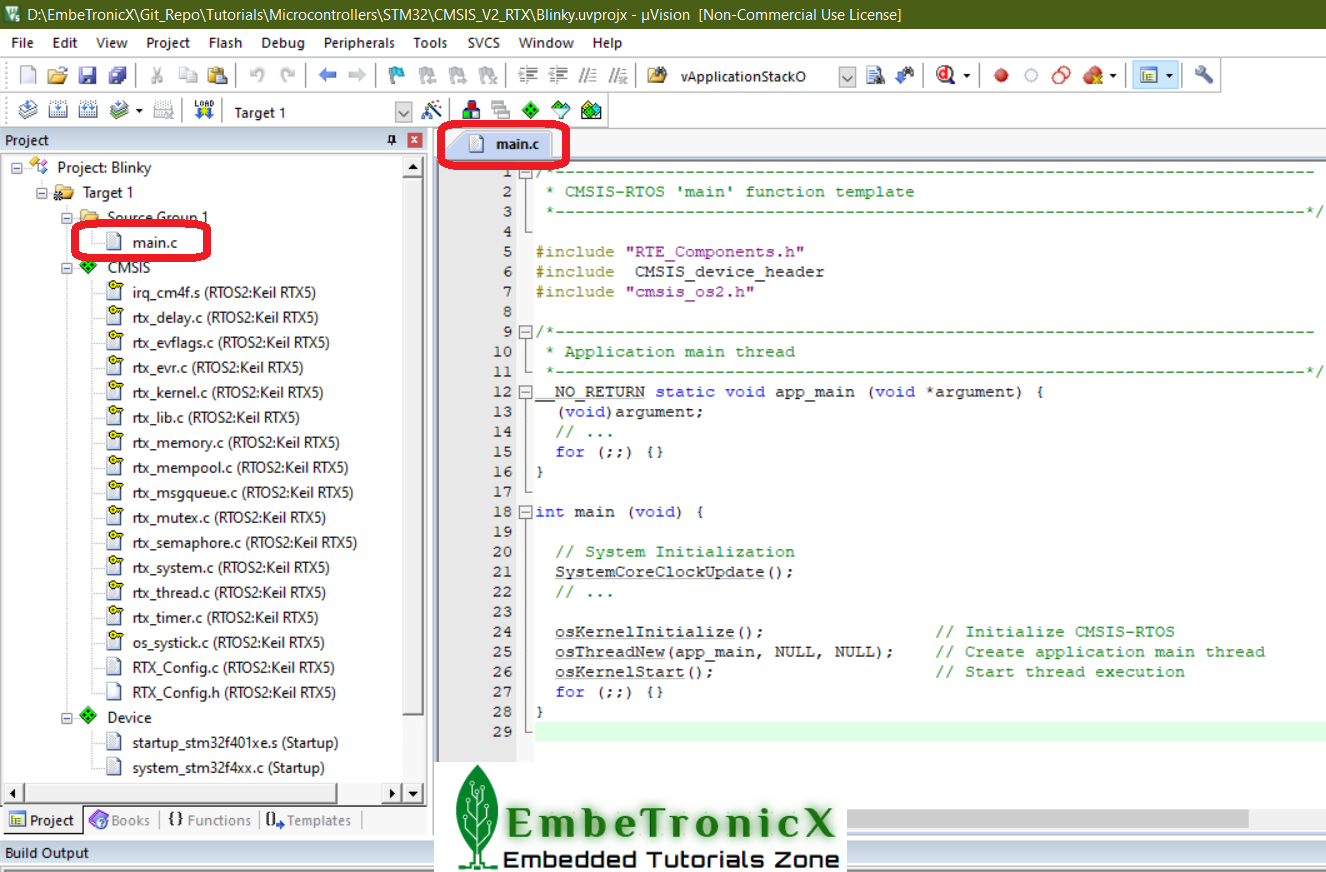
12. The main file with the template should have been created like below.
|
|
|
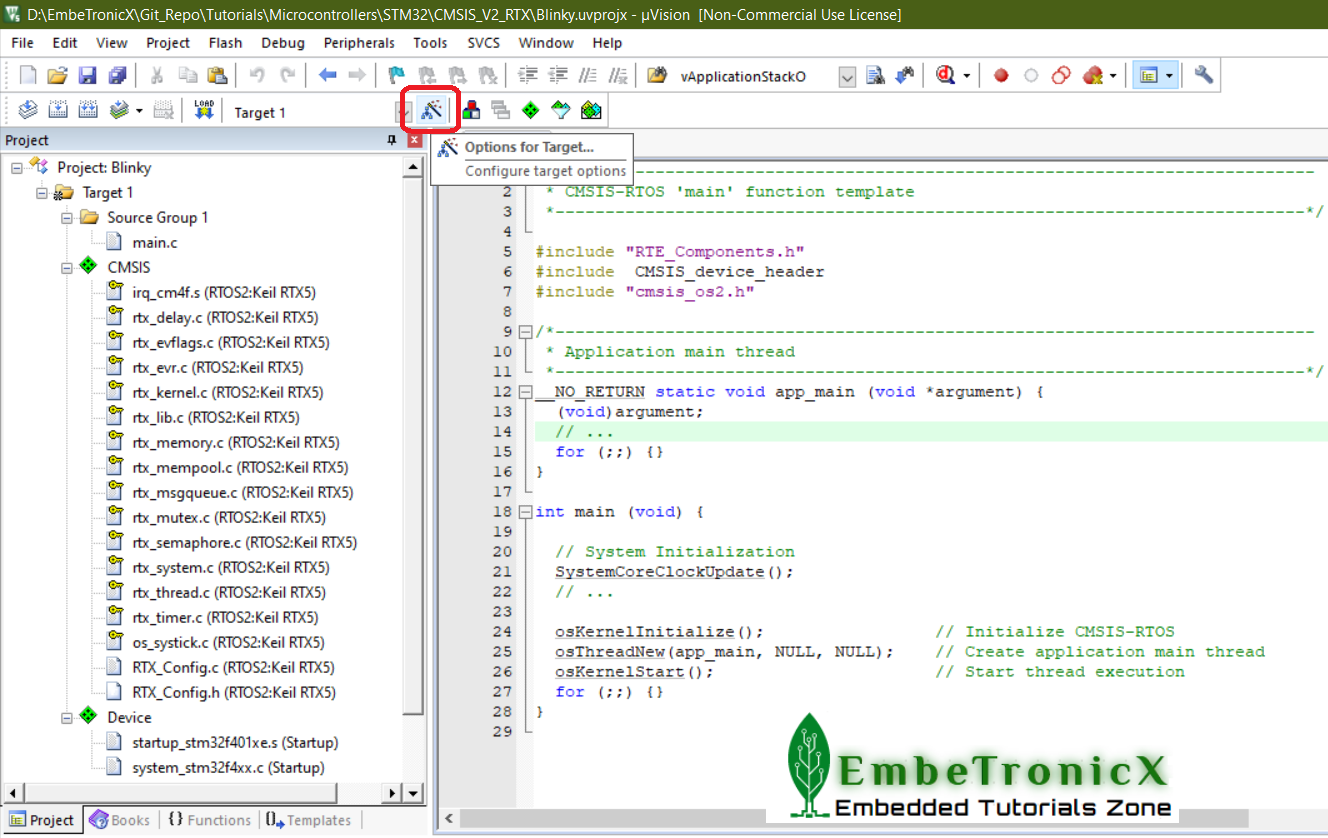
13. Till now we have created the project with source code. Now we will enable the option to create the hex file when we build. Click the ‘Options for Target’ like below.
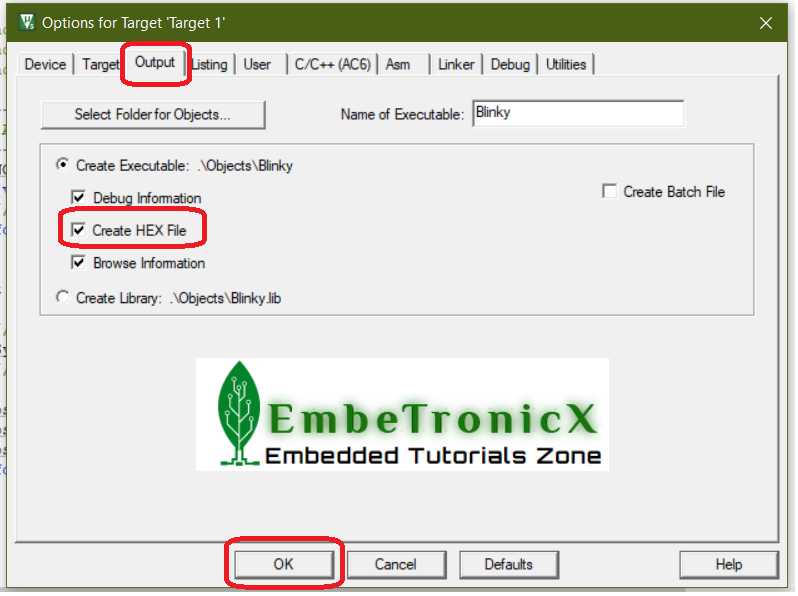
14. In the Options for Target ‘Target 1’, enable the Output → Create HEX File → OK.
 We are done with the setup now. You can build the project. The basic things are ready. In our next tutorial, we will see how to use STM32 in this project.
|
|
|
Please read the other STM32 Tutorials.
You can also read the below tutorials.

Embedded Software | Firmware | Linux Devic Deriver | RTOS
Hi, I am a tech blogger and an Embedded Engineer. I am always eager to learn and explore tech-related concepts. And also, I wanted to share my knowledge with everyone in a more straightforward way with easy practical examples. I strongly believe that learning by doing is more powerful than just learning by reading. I love to do experiments. If you want to help or support me on my journey, consider sharing my articles, or Buy me a Coffee! Thank you for reading my blog! Happy learning!

