This article is the continuation of the Series on the ESP32 Tutorials using ESP-IDF and carries the discussion on the ESP32 and its peripherals. The aim of this series is to provide easy and practical examples that anyone can understand. In this post we will setup the ESP-IDF in VS Code (ESP32 – Getting started with ESP-IDF in Visual Studio Code).
Table of Contents
ESP32 – Getting started with ESP-IDF in Visual Studio Code
To develop applications for ESP32 you need:
- PC loaded with either Windows, Linux or Mac operating system
- VS Code
- ESP32 board
Visual Studio Code and ESP32
Espressif have official support for VS Code. That VS code provide complete end to end support for all actions related to ESP-IDF namely build, flash, monitor, debug, tracing, core-dump, System Trace Viewer, etc. VS Code will be very easy to setup and this makes the ESP32 programming easier. VS Code supports the below operations on ESP32 development.
- Setup, will help you to quickly install ESP-IDF and its relevant toolchain with just few clicks.
- Build, with one click build and multi target build, you can easily build and deploy your applications.
- Flash, with both UART and JTAG flash out of the box.
- Monitoring comes with built-in terminal where you can trigger IDF Monitor Commands from within VS Code as you are used to in traditional terminals.
- GUI Menu Config, provides with simplified UI for configuring your chip.
- App & Heap Tracing, provides support for collecting traces from your application and simplified UI for analyzing them.
- System View Tracing Viewer, aims to read and display the .svdat files into trace UI, we also support multiple core tracing views.
- IDF Size Analysis Overview presents an UI for binary size analysis.
- Rainmaker Cloud <https://rainmaker.espressif.com/>`_, we have inbuilt Rainmaker Cloud support where you can edit/read state of your connected IoT devices easily.
- Code Coverage, we have inbuilt code coverage support which shall highlight in color which line have been covered. We also render the existing HTML report directly inside the IDE.
In this post, we will setup the ESP-IDF in VS Code.
Setup ESP-IDF in VS Code
- Download and Install the Visual Studio Code.
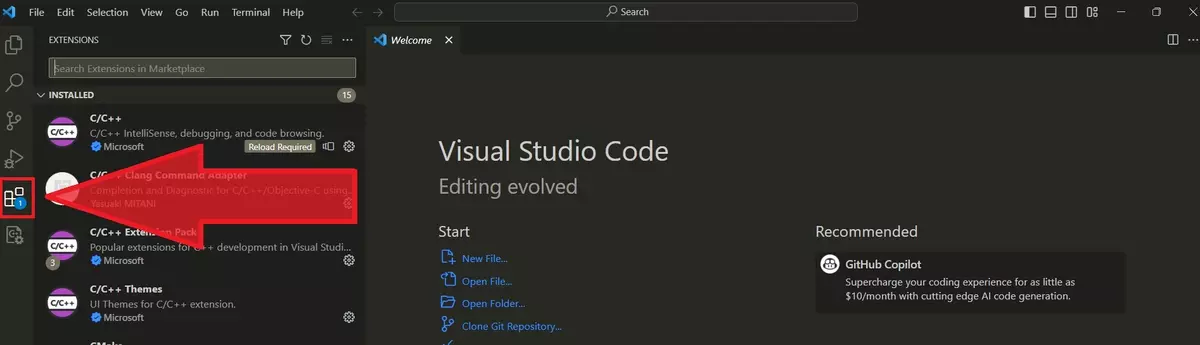
- Open the Extensions view by clicking on the Extension icon in the Activity Bar on the side of Visual Studio Code or the View: Extensions command (shortcut: Ctrl+Shift+X). Check the below image.
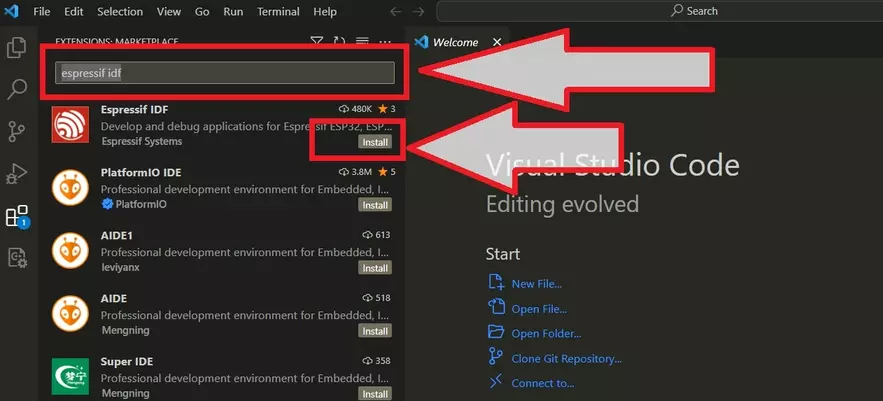
- Search the extension with “espressif idf”. Then install the Espressif IDF which is developed by Espressif Systems. Check the below image.
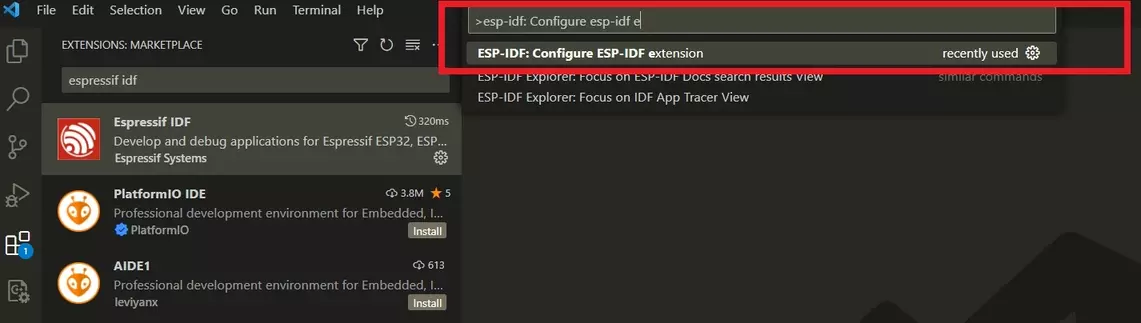
- After installing that Espressif IDF extension, now we need to configure it. Press F1 and type ESP-IDF: Configure ESP-IDF extension and click it. Check the below image.
- Now, you will get the below page.
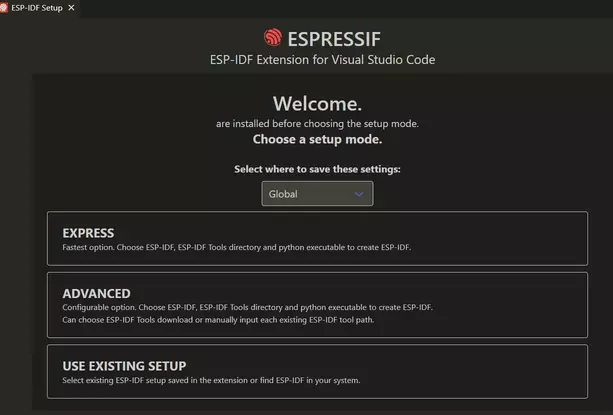
- Select the option based on your configuration. If you don’t have the existing ESP-IDF, then install it freshly. Otherwise, select the USE EXISTING SETUP. Now, we don’t have the existing setup. So, click EXPRESS. You will get the below page.
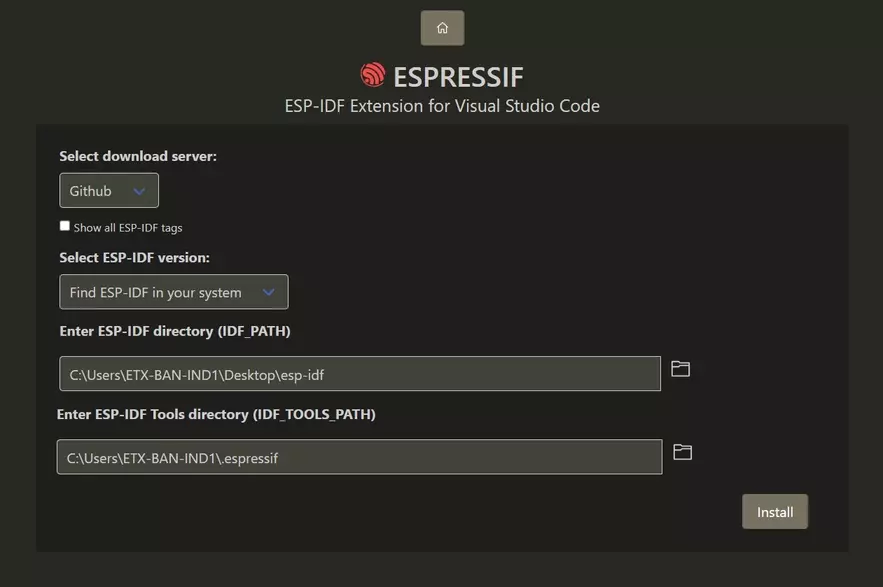
- If you have installed the ESP-IDF and ESP-IDF Tools, then provide the path. If you don’t have it, Select ESP-IDF version: to the version that you want to install. Check the below image. Here, we have selected the v5.1.2 version.

- Then click Install. This will download the ESP-IDF. This process will take sometime based on your internet speed. Check the below image.
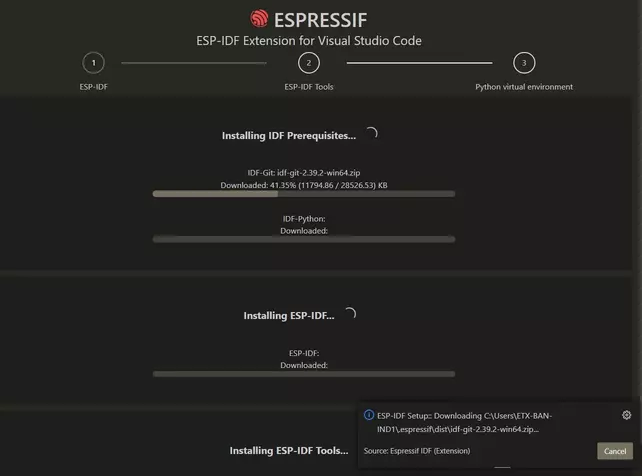
- This will install the ESP-IDF Framework, necessary toolchain (ESP-IDF Tools), all necessary files, and set up Python virtual environment. Once it is installed, you will get the below page mentioned “All settings have been configured. You can close this window“. You can close the window.
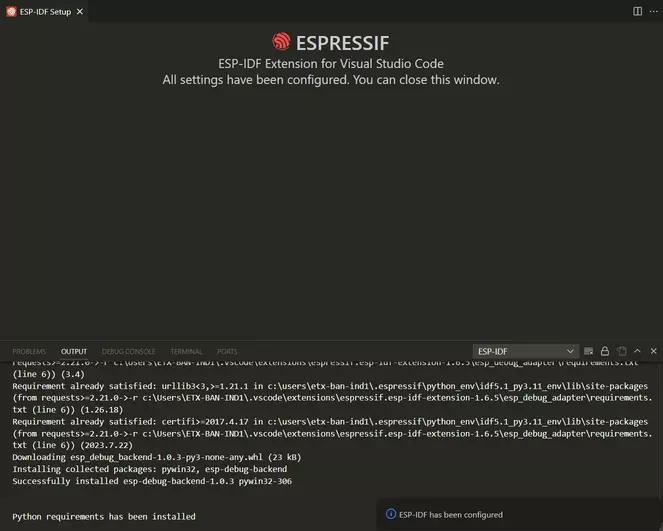
That’s it, we have configured. Now, we can build the example program and test.
You can find more information about setting up the ESP-IDF Visual Studio Code extension in the official ESP-IDF VSCode extension GitHub repository.
Building and loading the Hello World example
ESP-IDF uses FreeRTOS as an operating system. If we want to work in esp-idf, we should have knowledge on How to write a program using FreeRTOS’s API. For FreeRTOS, we have separate tutorials. Whenever I’m using some FreeRTOS API, that time itself I will explain that API. So don’t worry guys. Please also read RTOS Part 1 and RTOS Part 2.
Now we are going to see the first example “hello world”. Hello world is the first program for programming, who wants to learn any programming language. So we are also going to see that.
ESP-IDF has example projects for all the peripherals. Now, we will use the hello world example program.
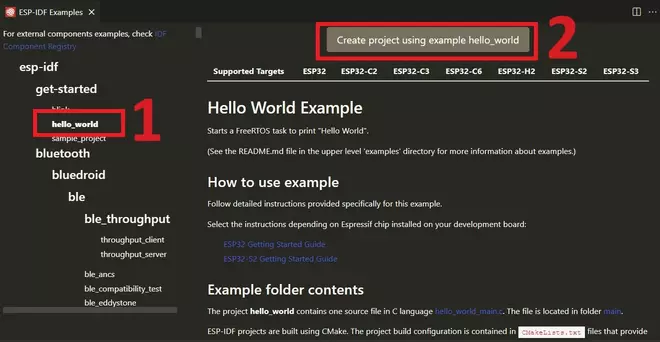
- Press
F1, and type ESP-IDF: Show Examples Projects. Then select the IDF Path. You will get the below page. In that, select hello_world and click Create project using example hello_world.
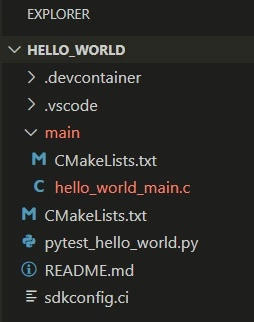
- Select the path where you want to save the code. This will create the example project and add the below files to the directory.
Hello World Source Code – Getting Started with ESP32
The below code prints the hello world and the chip details. After 10 seconds, it will restart the ESP32 again.
[Please download the complete project from GitHub]
/*
 * SPDX-FileCopyrightText: 2010-2022 Espressif Systems (Shanghai) CO LTD
 *
 * SPDX-License-Identifier: CC0-1.0
 */

#include <stdio.h>
#include <inttypes.h>
#include "sdkconfig.h"
#include "freertos/FreeRTOS.h"
#include "freertos/task.h"
#include "esp_chip_info.h"
#include "esp_flash.h"

void app_main(void)
{
    printf("Hello world!\n");

    /* Print chip information */
    esp_chip_info_t chip_info;
    uint32_t flash_size;
    esp_chip_info(&chip_info);
    printf("This is %s chip with %d CPU core(s), %s%s%s%s, ",
           CONFIG_IDF_TARGET,
           chip_info.cores,
           (chip_info.features & CHIP_FEATURE_WIFI_BGN) ? "WiFi/" : "",
           (chip_info.features & CHIP_FEATURE_BT) ? "BT" : "",
           (chip_info.features & CHIP_FEATURE_BLE) ? "BLE" : "",
           (chip_info.features & CHIP_FEATURE_IEEE802154) ? ", 802.15.4 (Zigbee/Thread)" : "");

    unsigned major_rev = chip_info.revision / 100;
    unsigned minor_rev = chip_info.revision % 100;
    printf("silicon revision v%d.%d, ", major_rev, minor_rev);
    if(esp_flash_get_size(NULL, &flash_size) != ESP_OK) {
        printf("Get flash size failed");
        return;
    }

    printf("%" PRIu32 "MB %s flash\n", flash_size / (uint32_t)(1024 * 1024),
           (chip_info.features & CHIP_FEATURE_EMB_FLASH) ? "embedded" : "external");

    printf("Minimum free heap size: %" PRIu32 " bytes\n", esp_get_minimum_free_heap_size());

    for (int i = 10; i >= 0; i--) {
        printf("Restarting in %d seconds...\n", i);
        vTaskDelay(1000 / portTICK_PERIOD_MS);
    }
    printf("Restarting now.\n");
    fflush(stdout);
    esp_restart();
}
Build the source code by pressing F1 and then typing ESP-IDF: Build your project or just simply pressing the below icon.
Let it build. Once it is build, we can flash the code to the real hardware. Select the COM Port. In my case, it is COM5. Then Select the Flash method ad UART and Flash the code. Check the below image.
Note: When you see the Connecting………., please press the BOOT pin.
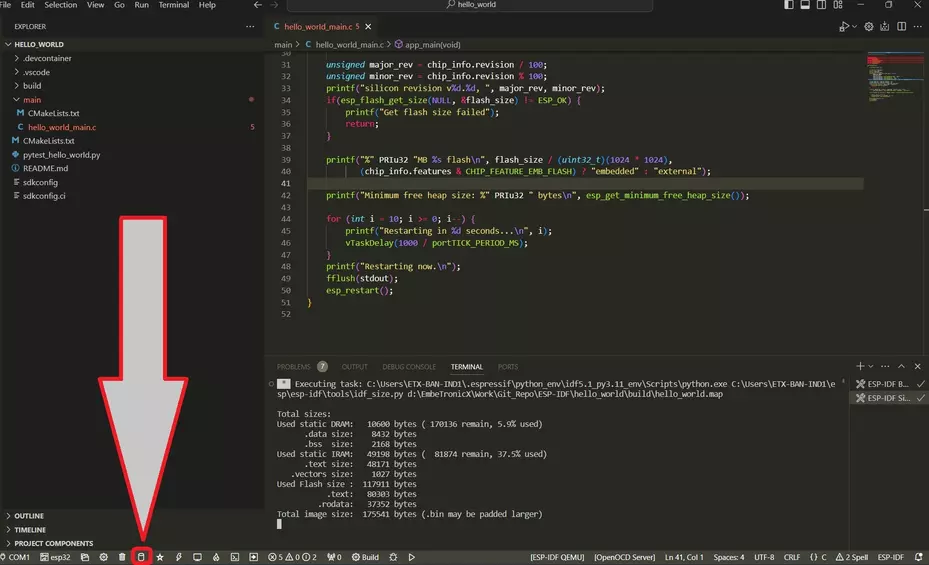
Now the code has been flashed to the ESP32. Lets run the monitor by pressing the below icon.

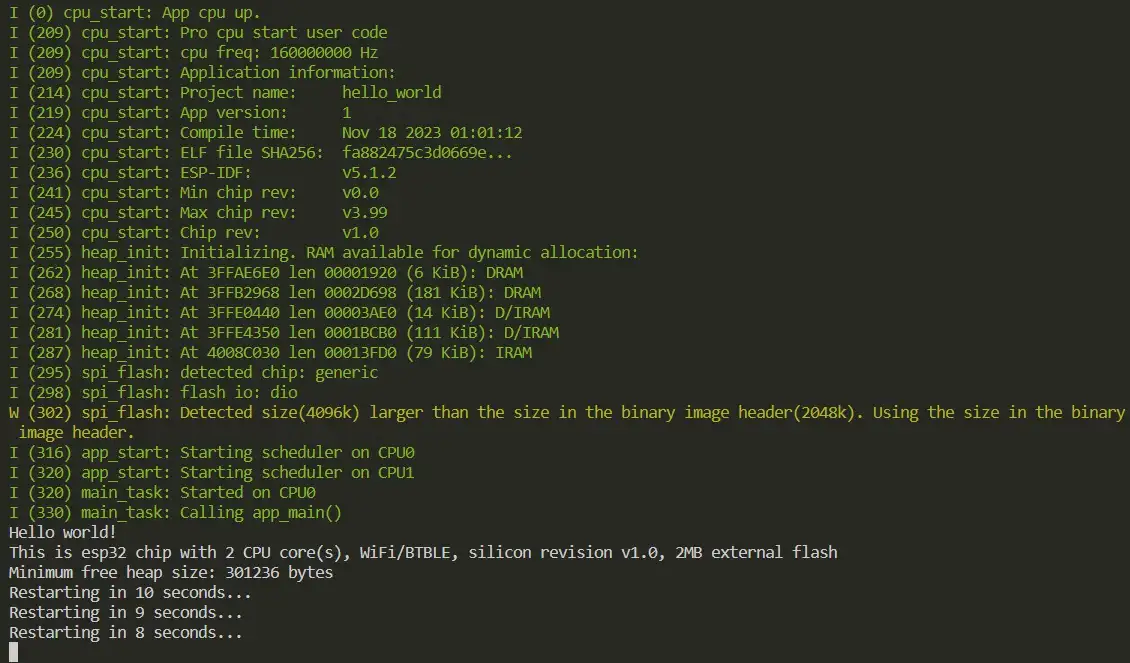
Hello World Demo – Getting Started with ESP32
You should see the hello world print and other information in the terminal. Check the below image.
Create an Empty project
If you don’t want to use the example project, then we can create the empty project.
Press F1, and type ESP-IDF: Show Examples Projects. Then select the IDF Path. You will get the below page. In that, select sample_project, then Create project using example sample_project.
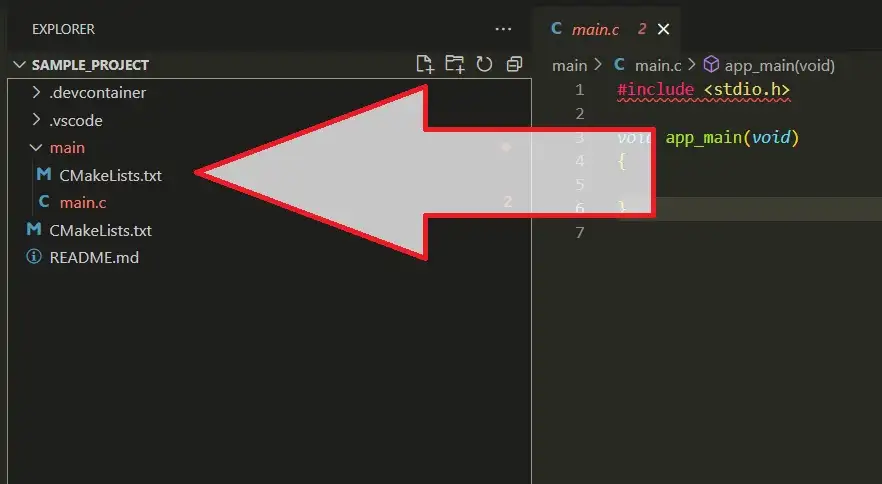
Then provide the path where you want create the project. The sample project is created. You should get the below files. You can add your code in main.c or create the new files.
Note: If you are adding any new files, you should add that in the CMakeLists.txt file which is under main directory.
That’s all. Now we have the empty project.
In our next tutorial, we will ESP32 GPIO Control using ESP-IDF.
You can also read the below tutorials.
Embedded Software | Firmware | Linux Devic Deriver | RTOS
Hi, I am a tech blogger and an Embedded Engineer. I am always eager to learn and explore tech-related concepts. And also, I wanted to share my knowledge with everyone in a more straightforward way with easy practical examples. I strongly believe that learning by doing is more powerful than just learning by reading. I love to do experiments. If you want to help or support me on my journey, consider sharing my articles, or Buy me a Coffee! Thank you for reading my blog! Happy learning!
